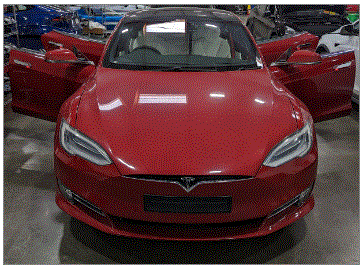
- Open all four doors
 Courtesy of TESLA, INC.
|
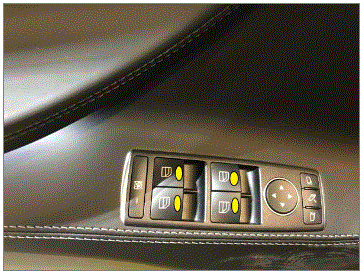
- Lower all four windows
 Courtesy of TESLA, INC.
|
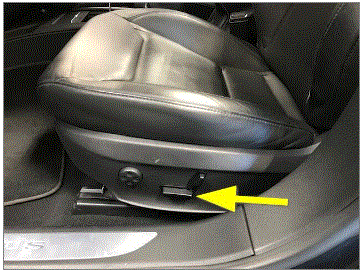
- Move LH front seat forward
 Courtesy of TESLA, INC.
|
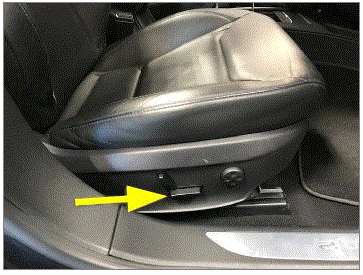
- Move RH front seat forward
 Courtesy of TESLA, INC.
|
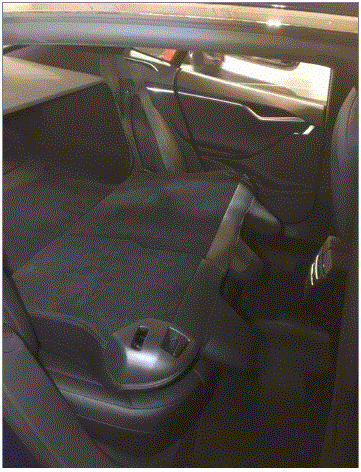
- Fold 60 and 40 seat into down position
 Courtesy of TESLA, INC.
|
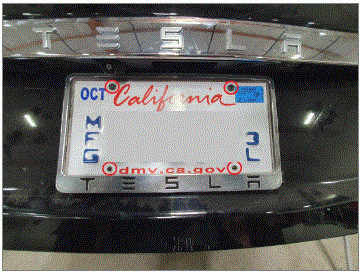
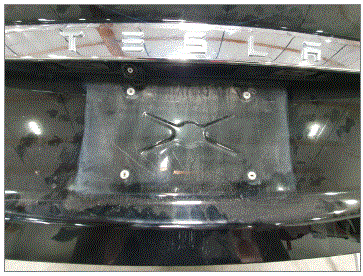
- Remove rear license plate
NOTE:
4x screws, phillips head
 Courtesy of TESLA, INC.
|
 Courtesy of TESLA, INC.
|
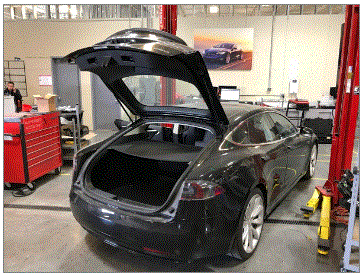
- Open liftgate
 Courtesy of TESLA, INC.
|
- Remove parcel shelf
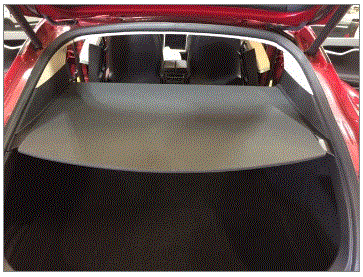 Courtesy of TESLA, INC.
|
- Remove trunk load floor
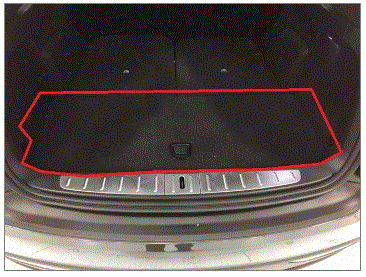 Courtesy of TESLA, INC.
|
- Remove upper liftgate trim
NOTE:
4x clips, Replace any damaged clips
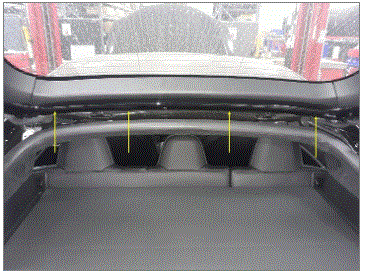 Courtesy of TESLA, INC.
|
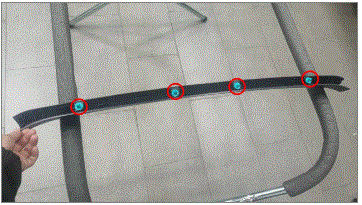 Courtesy of TESLA, INC.
|
- Remove liftgate LH side trim panel
NOTE:
3x clips, Replace any damaged clips
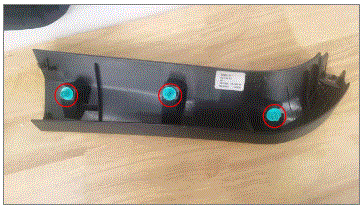 Courtesy of TESLA, INC.
|
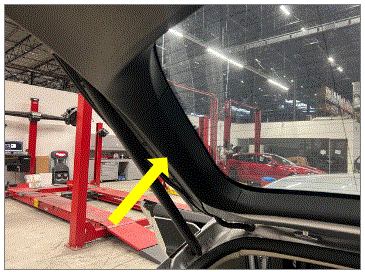 Courtesy of TESLA, INC.
|
- Remove liftgate RH side trim panel
NOTE:
3x clips, Replace any damaged clips
Courtesy of TESLA, INC.
|
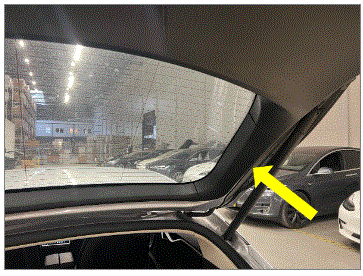 Courtesy of TESLA, INC.
|
- Remove pull cups from lower liftgate trim assembly
NOTE:
1x connector, If equipped with power liftgate
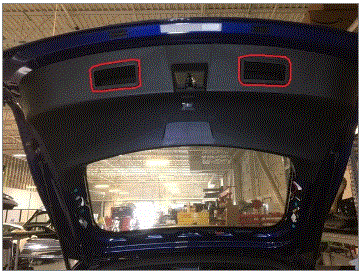 Courtesy of TESLA, INC.
|
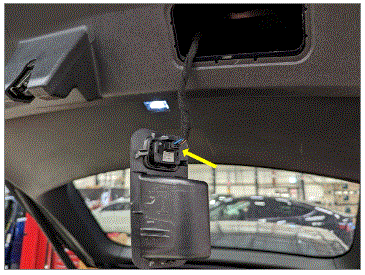 Courtesy of TESLA, INC.
|
- Remove screws securing lower liftgate trim to body
NOTE:
2x screws, T20, 3 N.m
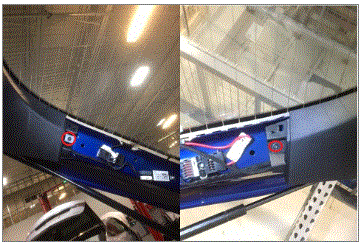 Courtesy of TESLA, INC.
|
- Remove lower liftgate trim
NOTE:
10x clips, 4x connectors, Number of connections may vary, Take care not to damage connectors when releasing trim
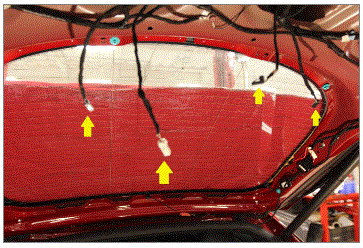 Courtesy of TESLA, INC.
|
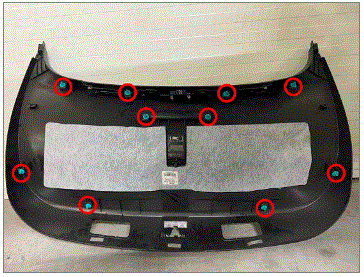 Courtesy of TESLA, INC.
|
- Disconnect CHMSL
NOTE:
1x connector
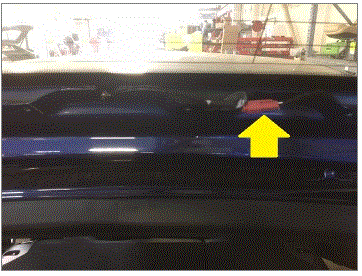 Courtesy of TESLA, INC.
|
- Remove LH antenna amplifier
NOTE:
1x screw, T25, 1.2 N.m, 3x connectors
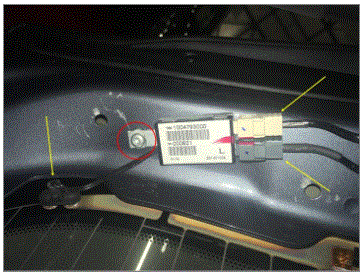 Courtesy of TESLA, INC.
|
- Remove LH RF filter
NOTE:
1x bolt, T30, 2 N.m, 1x connector, Discard after removal
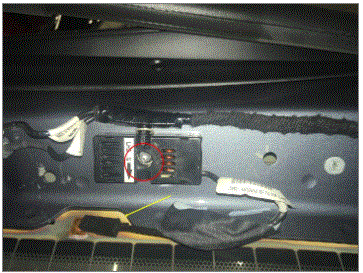 Courtesy of TESLA, INC.
|
- Remove RH antenna amplifier
NOTE:
1x screw, T25, 1.2 N.m, 2x connector
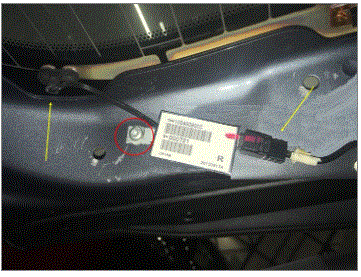 Courtesy of TESLA, INC.
|
- Remove RH RF filter
NOTE:
1x bolt, T30, 2 N.m, 2x connector, Discard after removal, Remove component from wiring harness
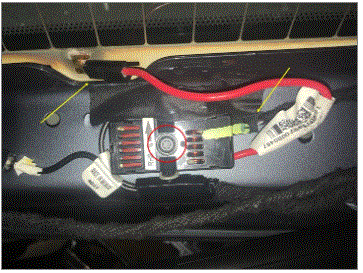 Courtesy of TESLA, INC.
|
- Disconnect RH tail lamp
NOTE:
1x connector
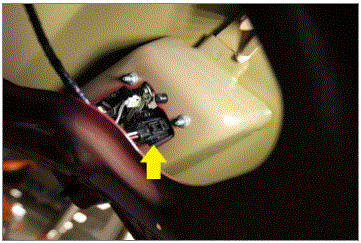 Courtesy of TESLA, INC.
|
- Disconnect LH tail lamp
NOTE:
1x connector
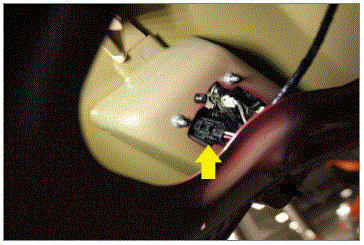 Courtesy of TESLA, INC.
|
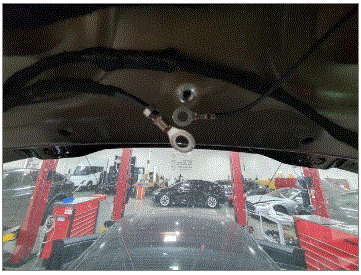
- Remove bolt securing liftgate grounding terminals
NOTE:
1x bolt, 10mm, 9 N.m, 2x ground terminals
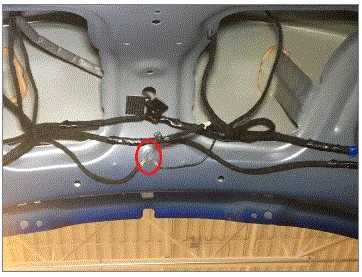 Courtesy of TESLA, INC.
|
 Courtesy of TESLA, INC.
|
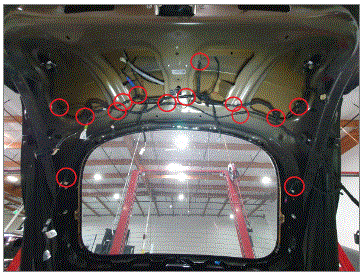
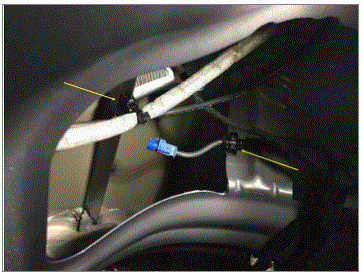
- Remove clips securing harnesses to liftgate assembly
NOTE:
13x fir tree clips, 1x edge clip
 Courtesy of TESLA, INC.
|
 Courtesy of TESLA, INC.
|
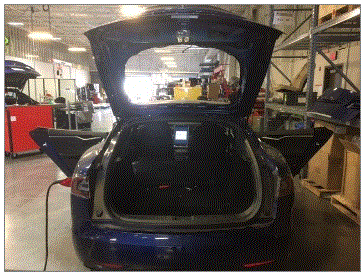
- Tuck the exposed wire harness into the rear liftgate
NOTE:
Caution not to damaged harness when closing the liftgate in the next step
 Courtesy of TESLA, INC.
|
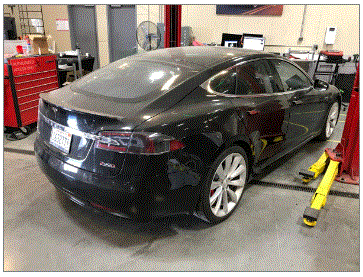
- Close liftgate
 Courtesy of TESLA, INC.
|
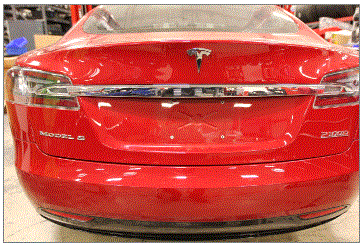
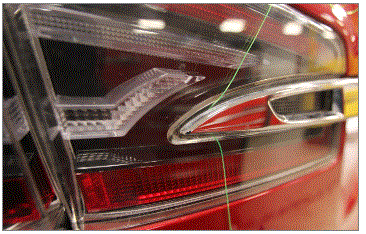
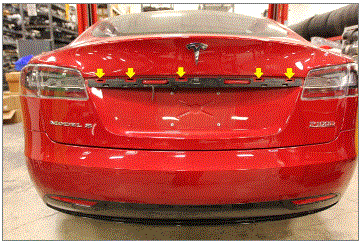
- Remove liftgate applique
NOTE:
5x clips Recommend using the badge removal wire to release adhesive on the tail lamps, Note the center of the applique is secured by clips, Take care not to damage applique or body
 Courtesy of TESLA, INC.
|
 Courtesy of TESLA, INC.
|
 Courtesy of TESLA, INC.
|
- Open liftgate
Courtesy of TESLA, INC.
|
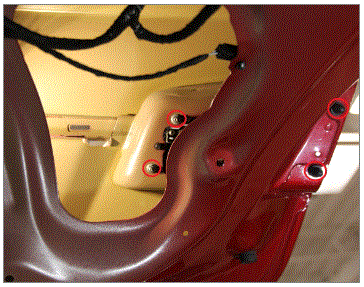
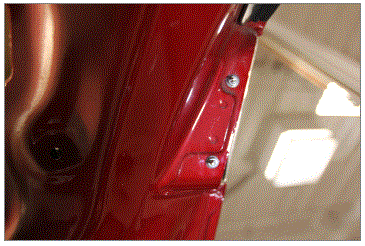
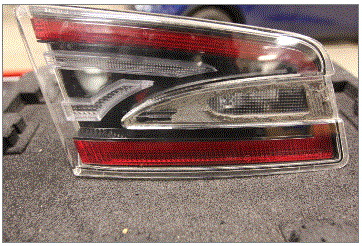
- Remove LH reverse tail lamp from liftgate
NOTE:
4x nuts, 8mm, 4 N.m, 2x rubber covers, Remove rubber covers
 Courtesy of TESLA, INC.
|
 Courtesy of TESLA, INC.
|
 Courtesy of TESLA, INC.
|
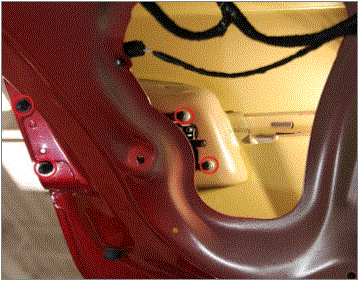
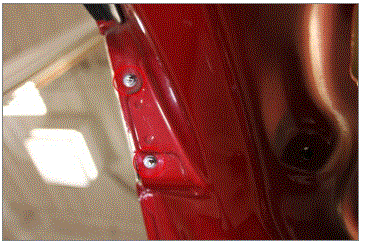
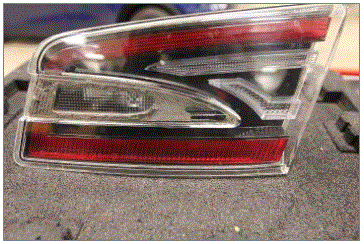
- Remove RH reverse tail lamp from liftgate
NOTE:
4x nuts, 8mm, 4 N.m, 2x rubber covers, Remove rubber covers
 Courtesy of TESLA, INC.
|
 Courtesy of TESLA, INC.
|
 Courtesy of TESLA, INC.
|
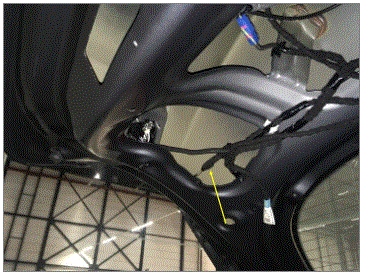
- Disconnect LH liftgate pinch strip sensor
NOTE:
1x connector
 Courtesy of TESLA, INC.
|
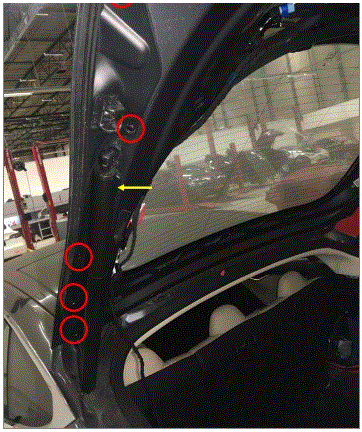
- Remove LH rear liftgate pinch strip assembly from the liftgate
NOTE:
6x push clip
 Courtesy of TESLA, INC.
|
- Remove LH pinch strip grommet and remove the pinch strip from the liftgate
NOTE:
1x grommet
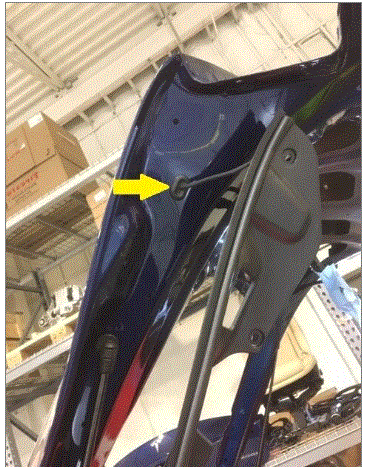 Courtesy of TESLA, INC.
|
- Disconnect RH liftgate pinch strip sensor
NOTE:
1x connector
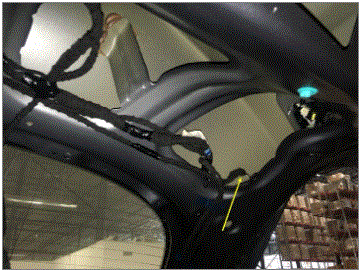 Courtesy of TESLA, INC.
|
- Remove RH rear liftgate pinch strip assembly from the liftgate
NOTE:
6x push clip
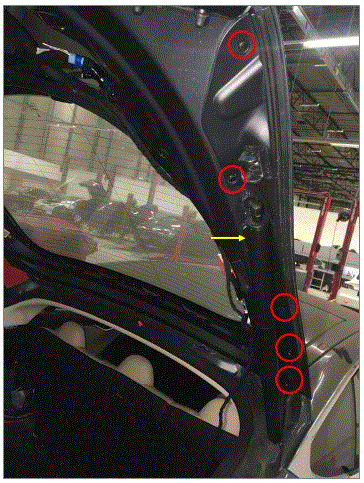 Courtesy of TESLA, INC.
|
- Remove RH pinch strip grommet and remove the pinch strip from the liftgate
NOTE:
1x grommet
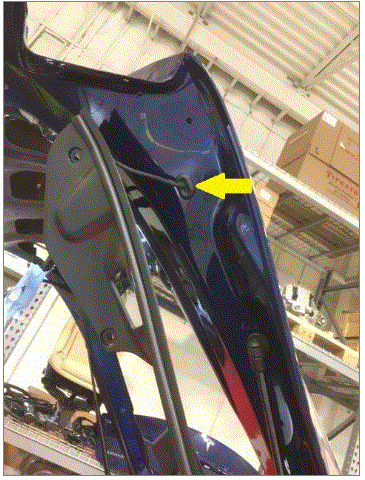 Courtesy of TESLA, INC.
|
- Remove bolts and screws securing rear view camera to bracket and bracket to liftgate
NOTE:
3x screws, T20, 2.4 N.m, 2x bolt, T25, 2.4 N.m, Discard rear view camera bolts after removal
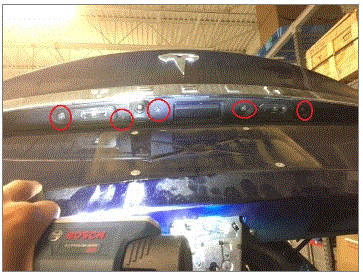 Courtesy of TESLA, INC.
|
- Install protective tape on rear view camera
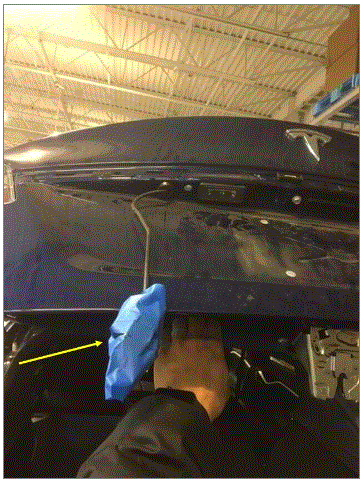 Courtesy of TESLA, INC.
|
- Remove rear view camera from liftgate
NOTE:
1x connector, 1x grommet, Take care not to let the rear view camera drop on the ground when releasing it from the liftgate
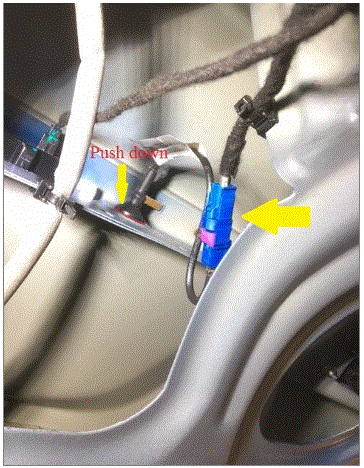 Courtesy of TESLA, INC.
|
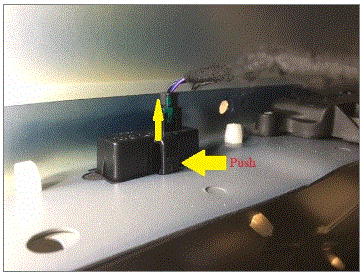
- Remove LH and RH license plate lamps
NOTE:
2x connector, 2x lamps, Depress the locking tab on the license plate lamp to release
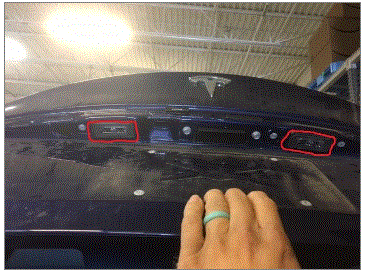 Courtesy of TESLA, INC.
|
 Courtesy of TESLA, INC.
|
- Close liftgate
Courtesy of TESLA, INC.
|
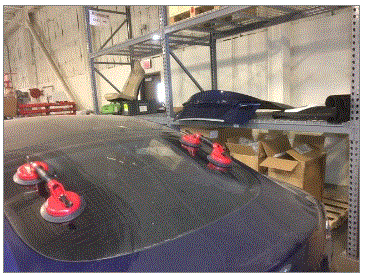
- Clean rear glass and secure double suction cup handles onto both side of liftgate glass
 Courtesy of TESLA, INC.
|
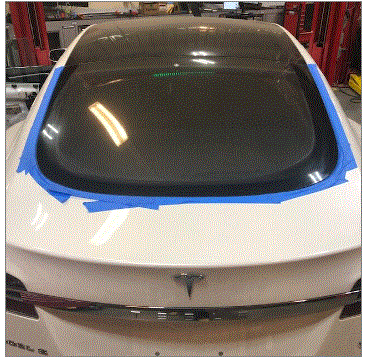
- Apply tape to body surrounding liftgate glass for protection
 Courtesy of TESLA, INC.
|
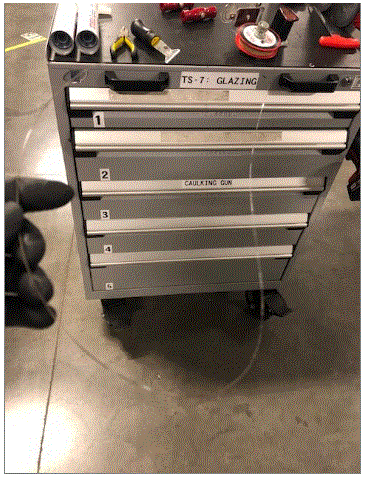
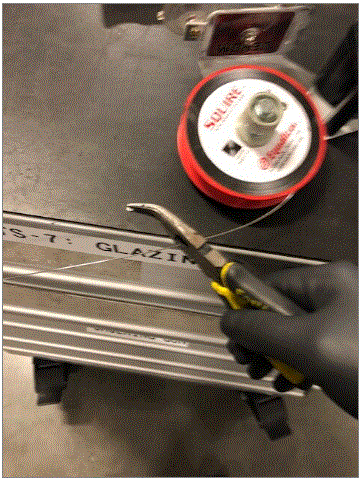
- Cut length of square wire to use with T-handles
NOTE:
Make sure there's adequate wire
 Courtesy of TESLA, INC.
|
 Courtesy of TESLA, INC.
|
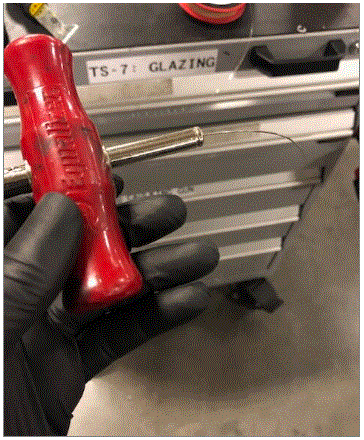
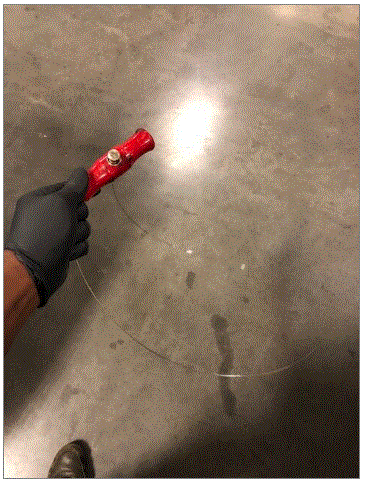
- Attach one side of wire to a T-handle
 Courtesy of TESLA, INC.
|
 Courtesy of TESLA, INC.
|
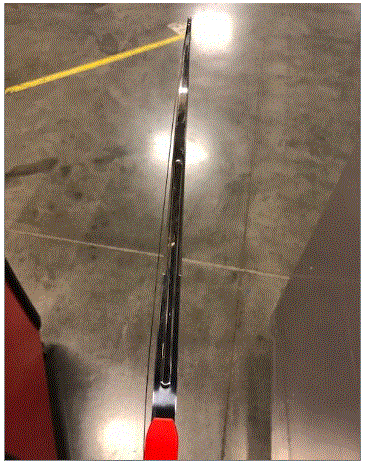
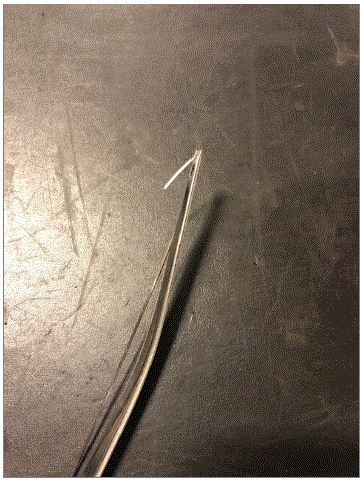
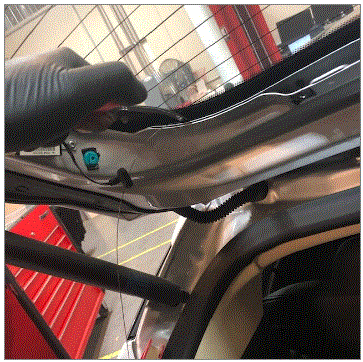
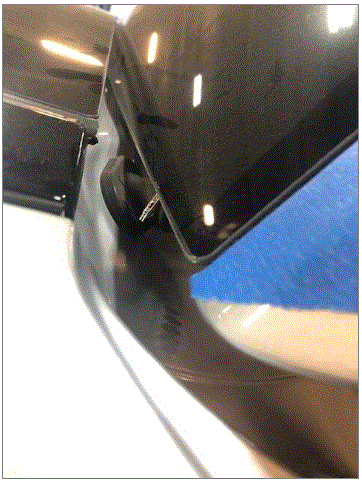
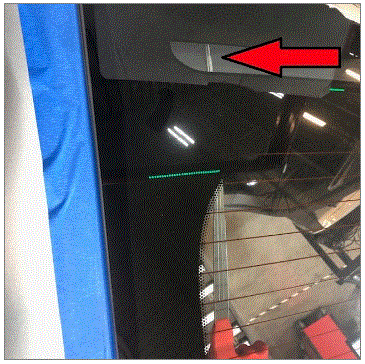
- Secure wire to starter tool and push tool through urethane at upper left side
NOTE:
Push starter wire tool in between liftgate glass and CHMSL
 Courtesy of TESLA, INC.
|
 Courtesy of TESLA, INC.
|
 Courtesy of TESLA, INC.
|
 Courtesy of TESLA, INC.
|
 Courtesy of TESLA, INC.
|
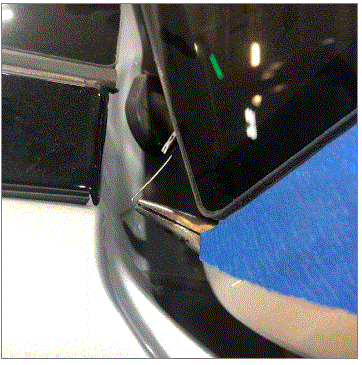
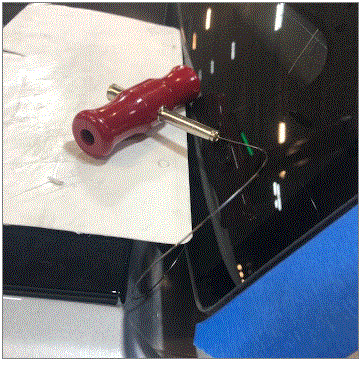
- Remove wire from starter tool and secure square wire into one T-handle
 Courtesy of TESLA, INC.
|
 Courtesy of TESLA, INC.
|
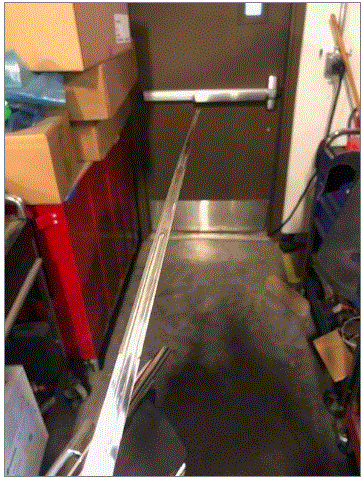
- Remove wire starter tool from vehicle
 Courtesy of TESLA, INC.
|
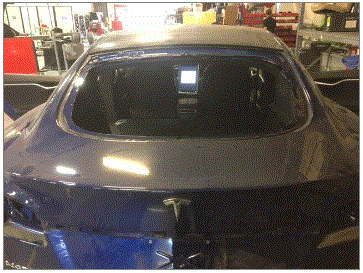
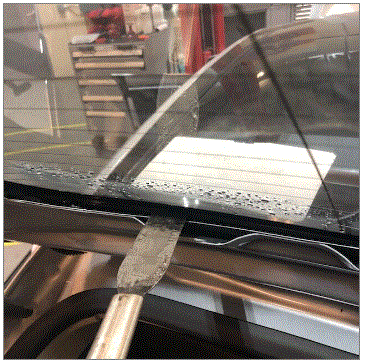
- Cut out and remove rear liftgate glass
NOTE:
Recommend assistance, if wire is getting caught on center high mounted stop lamp, equalizer can be used to separate CHMSL from liftgate glass
 Courtesy of TESLA, INC.
|
 Courtesy of TESLA, INC.
|
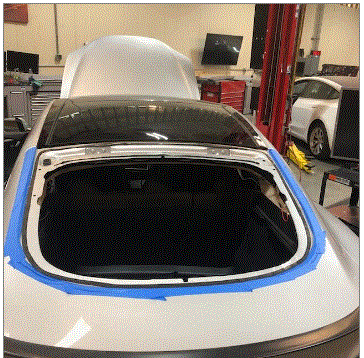
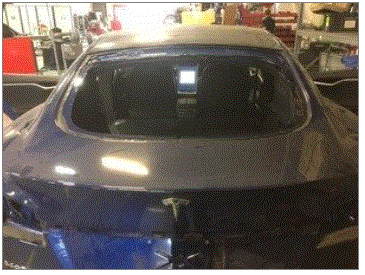
- Remove protective tape from body
NOTE:
Inspect for any nicks that may need touch up
 Courtesy of TESLA, INC.
|
 Courtesy of TESLA, INC.
|
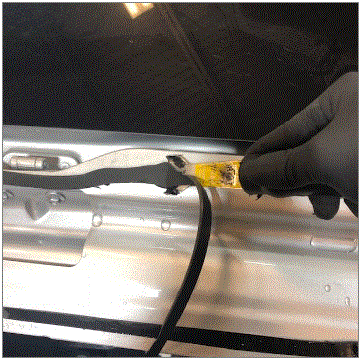
- Remove urethane from the liftgate glass and body
NOTE:
A recommended method for this step is to grip a razor blade with a pair of pliers. Touch the blade to the body and gently push downwards
 Courtesy of TESLA, INC.
|
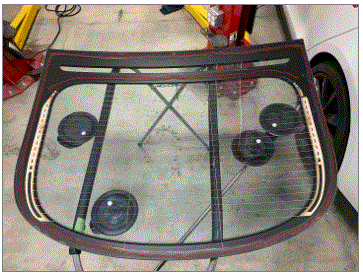 Courtesy of TESLA, INC.
|
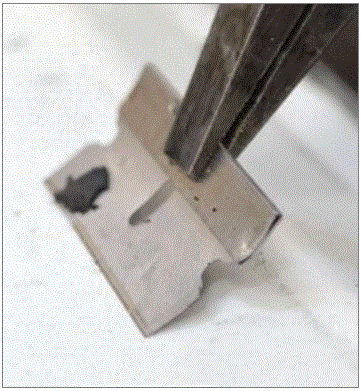 Courtesy of TESLA, INC.
|
- Open liftgate
Courtesy of TESLA, INC.
|
- Remove LH and RH liftgate drain plug
NOTE:
Note 2x drain plug
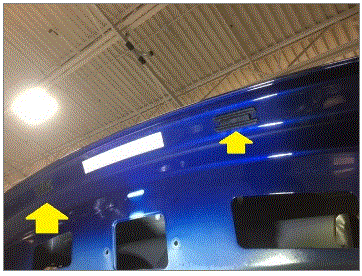 Courtesy of TESLA, INC.
|
- Remove bolts securing LH and RH liftgate wedge bumpers to liftgate
NOTE:
2x bolt, T30, 12 N.m, 2x caps
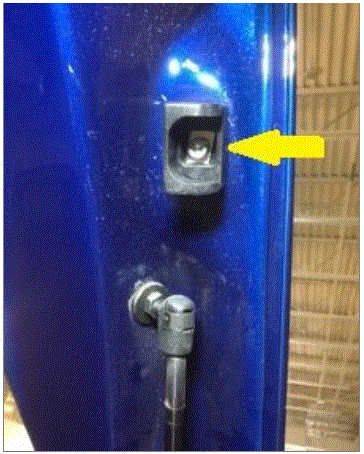 Courtesy of TESLA, INC.
|
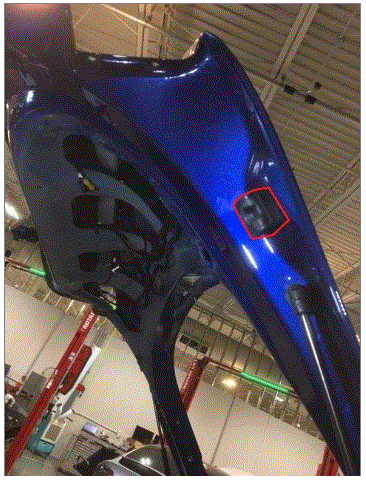 Courtesy of TESLA, INC.
|
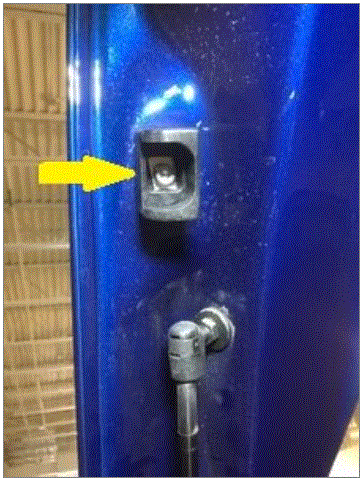 Courtesy of TESLA, INC.
|
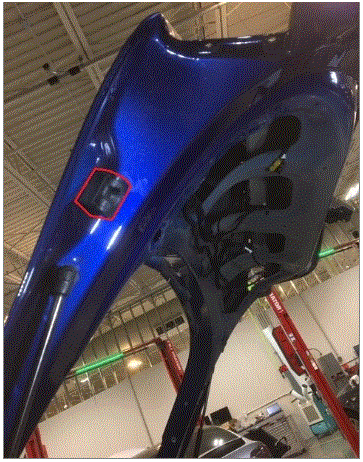 Courtesy of TESLA, INC.
|
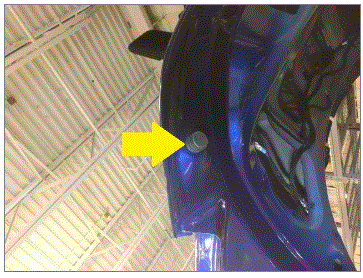
- Remove LH and RH lower bumps from liftgate
NOTE:
2x bump stop
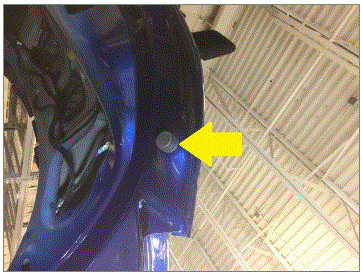 Courtesy of TESLA, INC.
|
 Courtesy of TESLA, INC.
|
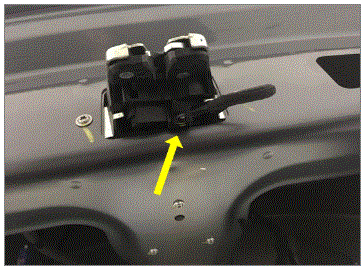
- Disconnect liftgate latch
NOTE:
1x connector
 Courtesy of TESLA, INC.
|
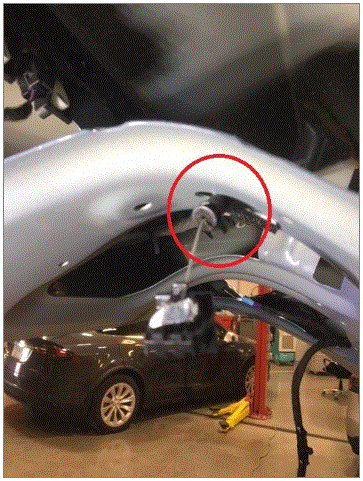
- Remove liftgate latch emergency release cable from rear liftgate
NOTE:
1x edge clip
 Courtesy of TESLA, INC.
|
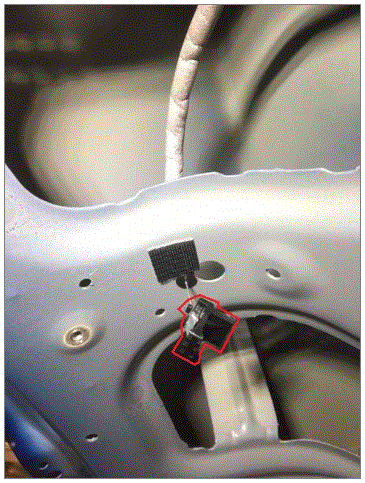
- Remove emergency liftgate release cable tether from end of release cable
NOTE:
Peel of the butyl and remove cable
 Courtesy of TESLA, INC.
|
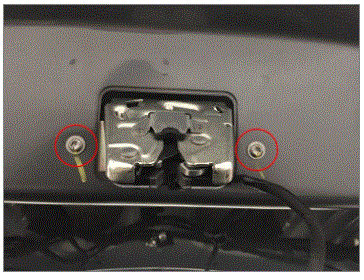
- Remove liftgate latch assembly from liftgate
NOTE:
2x bolts, T30, 10 N.m
 Courtesy of TESLA, INC.
|
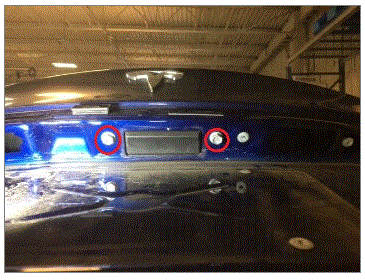
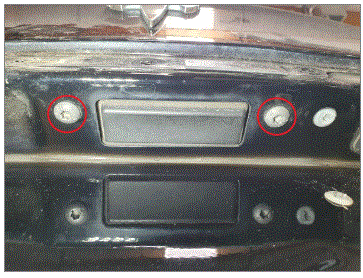
- Remove bolts securing liftgate release button to liftgate
NOTE:
2x bolts, 10mm / T30, 3 N.m
 Courtesy of TESLA, INC.
|
 Courtesy of TESLA, INC.
|
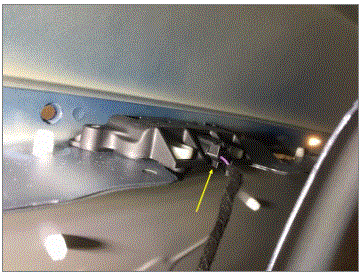
- Remove liftgate release button from liftgate
NOTE:
1x connector
 Courtesy of TESLA, INC.
|
- Release RH liftgate harness grommet from liftgate
NOTE:
1x grommet
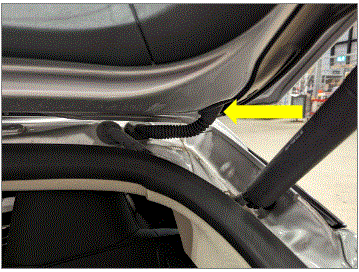 Courtesy of TESLA, INC.
|
- Place a fender cover on vehicle RH side
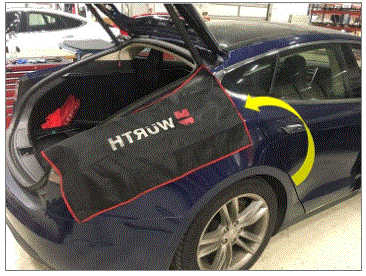 Courtesy of TESLA, INC.
|
- Pull wire harness through RH top liftgate grommet hole
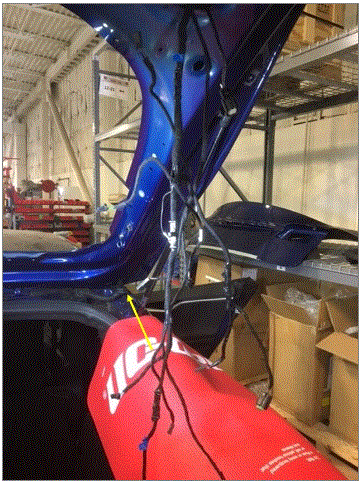 Courtesy of TESLA, INC.
|
- Release LH liftgate harness grommet from body
NOTE:
1x grommet
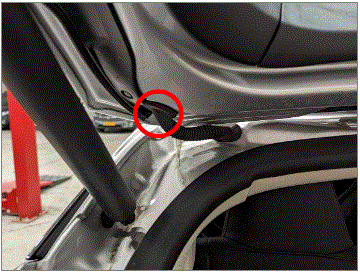 Courtesy of TESLA, INC.
|
- Place a fender cover on vehicle LH side
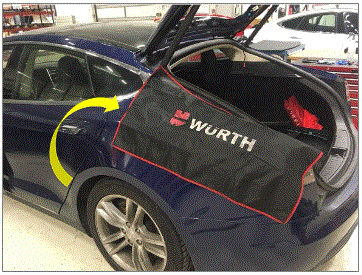 Courtesy of TESLA, INC.
|
- Route LH liftgate harness through grommet hole
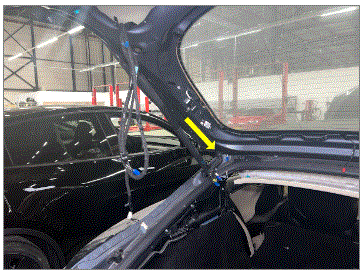 Courtesy of TESLA, INC.
|
- Disconnect GPS antenna from LH liftgate harness
NOTE:
Remove tape as needed
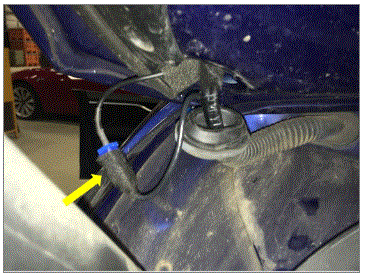 Courtesy of TESLA, INC.
|
- Remove GPS antenna from liftgate
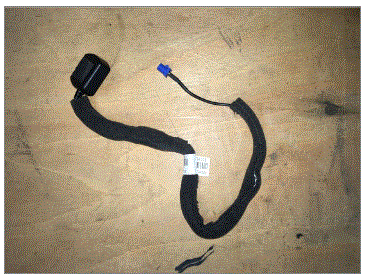 Courtesy of TESLA, INC.
|
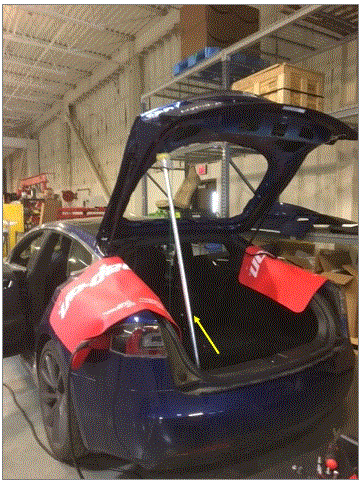
- Support liftgate
NOTE:
Need assistance
 Courtesy of TESLA, INC.
|
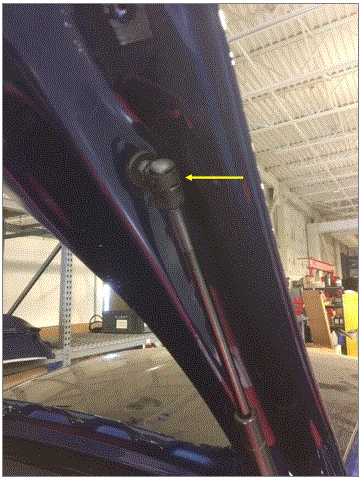
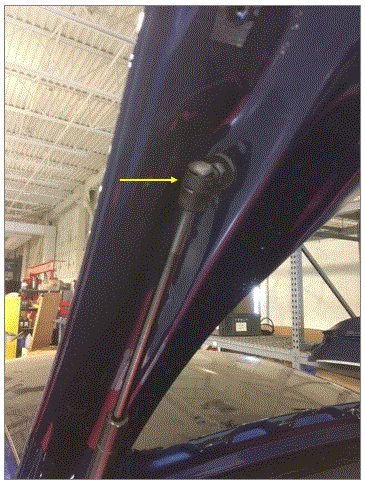
- Disconnect LH and RH liftgate struts from liftgate
NOTE:
2x strut clip
 Courtesy of TESLA, INC.
|
 Courtesy of TESLA, INC.
|
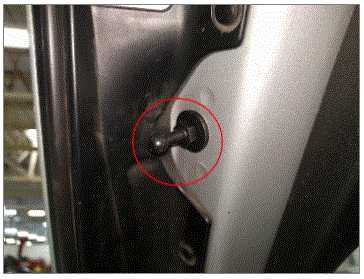
- Remove LH liftgate strut ball stud from liftgate
NOTE:
1x patched ball stud, 13mm, 22 N.m, Discard after removal
 Courtesy of TESLA, INC.
|
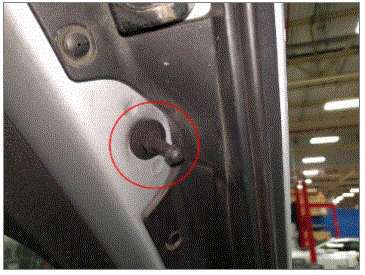
- Remove RH liftgate strut ball stud from liftgate
NOTE:
1x patched ball stud, 13mm, 22 N.m, Discard after removal
 Courtesy of TESLA, INC.
|
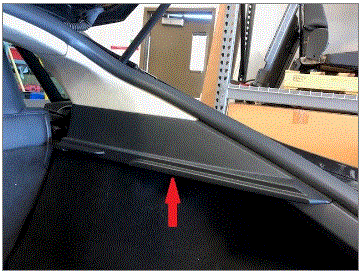
- Remove RH rear C-pillar trim
NOTE:
1x screw, T25, 3 N.m, 4x clips
 Courtesy of TESLA, INC.
|
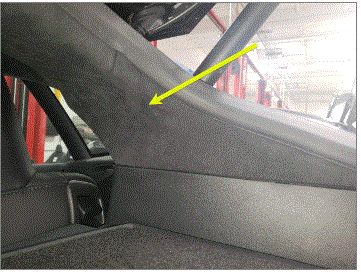
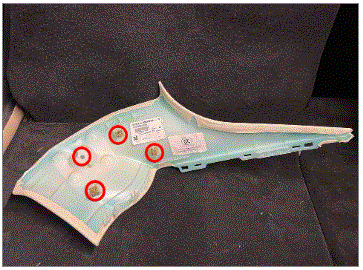
- Remove RH upper C-pillar trim
NOTE:
4x clips
 Courtesy of TESLA, INC.
|
 Courtesy of TESLA, INC.
|
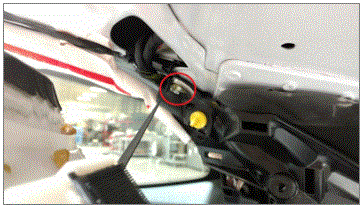
- Remove bolt securing headliner and support strap at RH C-pillar
NOTE:
1x bolt, 8mm, 10 N.m
 Courtesy of TESLA, INC.
|
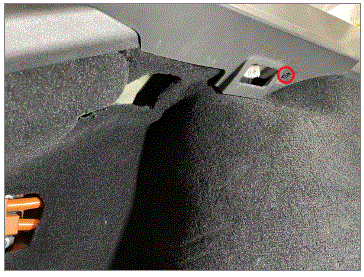
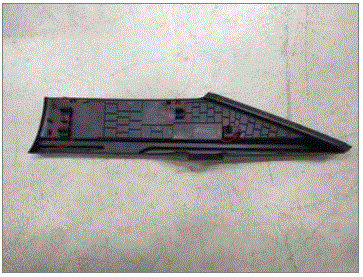
- Remove LH rear C-pillar trim
NOTE:
1x screw, T25, 3 N.m, 4x clips
 Courtesy of TESLA, INC.
|
 Courtesy of TESLA, INC.
|
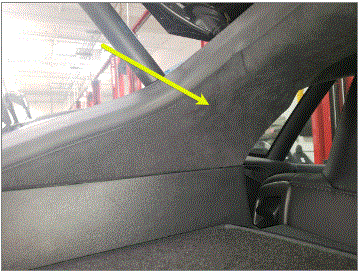
- Remove LH C-pillar upper trim
NOTE:
4x clips
 Courtesy of TESLA, INC.
|
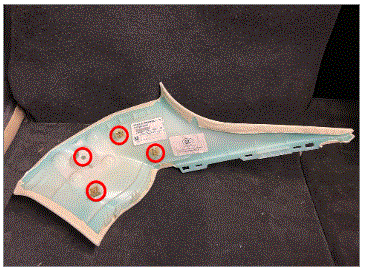 Courtesy of TESLA, INC.
|
- Remove bolt securing headliner and support strap at LH C-pillar
NOTE:
1x bolt, 8mm, 10 N.m
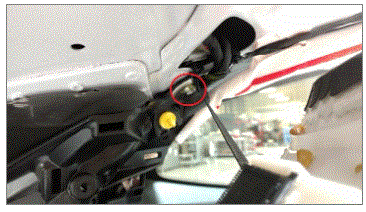 Courtesy of TESLA, INC.
|
- Release rear of headliner and lower
NOTE:
5x clips, 3x velcro strips
- Close liftgate
Courtesy of TESLA, INC.
|
- Remove nuts securing liftgate hinge to body
NOTE:
4x nuts, 10mm, 16 N.m, Remove from inside of the vehicle, Move butyl patch aside to expose nuts securing liftgate hinge to body
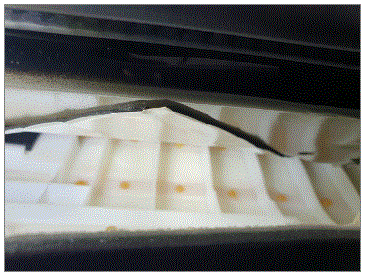 Courtesy of TESLA, INC.
|
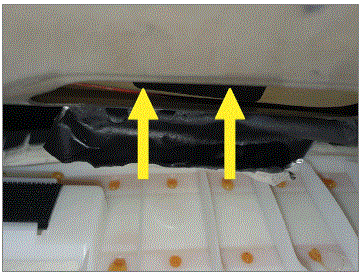 Courtesy of TESLA, INC.
|
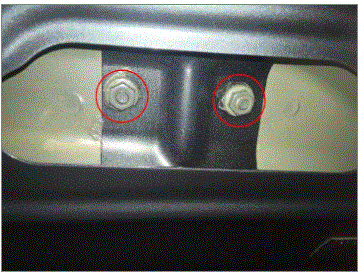 Courtesy of TESLA, INC.
|
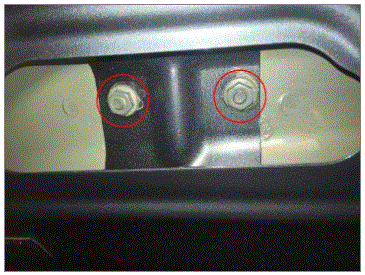 Courtesy of TESLA, INC.
|
- Remove liftgate from vehicle
NOTE:
Recommend assistance
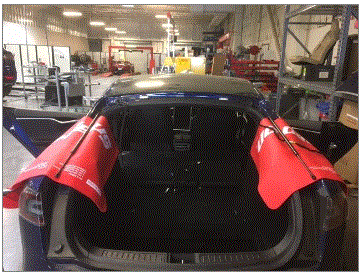 Courtesy of TESLA, INC.
|
- Prepare liftgate for installation
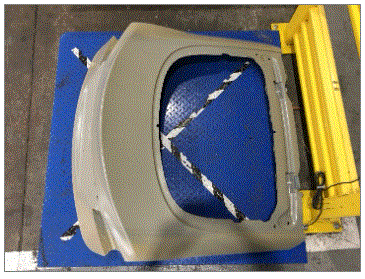 Courtesy of TESLA, INC.
|
- Install RH liftgate strut ball stud onto liftgate
NOTE:
1x patched ball stud, 13mm, 22 N.m, Install new patched ball stud
Courtesy of TESLA, INC.
|
- Install LH liftgate strut ball stud onto liftgate
NOTE:
1x patched ball stud, 13mm, 22 N.m, Install new patched ball stud
Courtesy of TESLA, INC.
|
- Install liftgate onto vehicle
NOTE:
4x nuts, 10mm, 16 N.m, Recommend assistance, Do not fully tighten the liftgate in this step
Courtesy of TESLA, INC.
|
Courtesy of TESLA, INC.
|
- Connect RH liftgate strut onto liftgate
NOTE:
1x strut clip
Courtesy of TESLA, INC.
|
- Connect LH liftgate strut onto liftgate
NOTE:
1x strut clip
Courtesy of TESLA, INC.
|
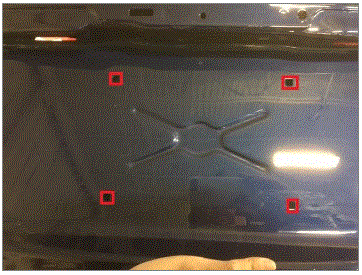
- Install license plate frame screw grommets onto liftgate
NOTE:
4x screw grommets
 Courtesy of TESLA, INC.
|
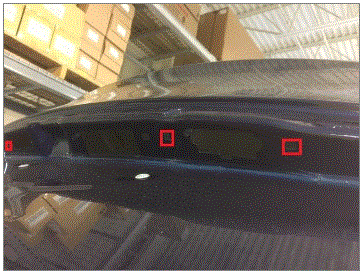
- Install applique bracket screw grommets onto liftgate
NOTE:
3x screw grommets
 Courtesy of TESLA, INC.
|
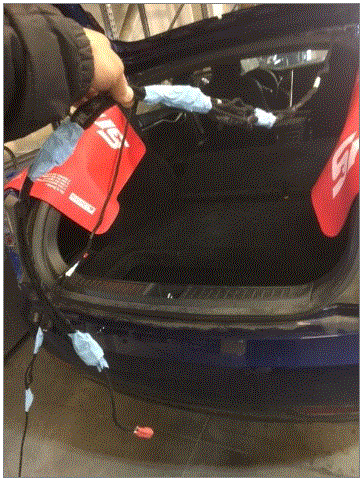
- Use tape and wrap up right side wire harness to protect connectors during installation
 Courtesy of TESLA, INC.
|
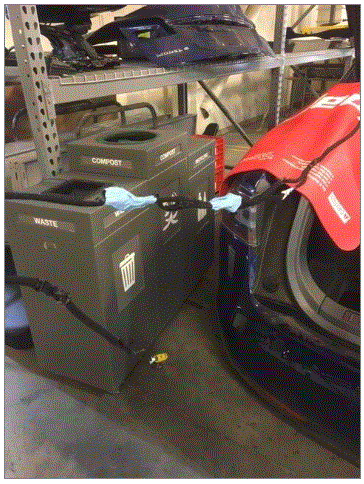
- Use tape and wrap up left side wire harness to protect connectors during installation
 Courtesy of TESLA, INC.
|
- Route RH liftgate harness through grommet hole
NOTE:
Use zip ties and tape as needed
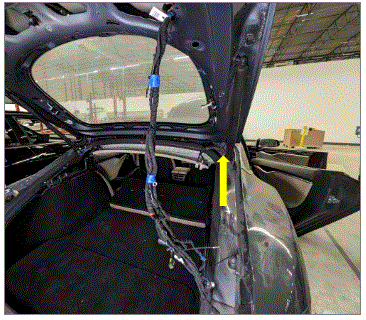 Courtesy of TESLA, INC.
|
- Secure RH liftgate harness grommet onto liftgate
NOTE:
1x grommet, Apply P-80 onto grommet for easier fit
Courtesy of TESLA, INC.
|
- Route LH liftgate harness through grommet hole
NOTE:
Use zip ties as needed
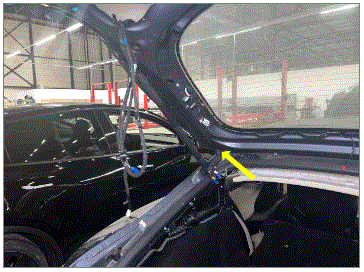 Courtesy of TESLA, INC.
|
- Route GPS antenna connector through LH top liftgate grommet hole
NOTE:
Route GPS antenna from outside, Remove red double sided tape cover and attach GPS antenna onto liftgate
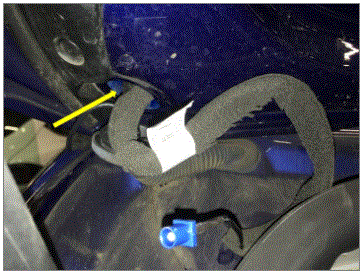 Courtesy of TESLA, INC.
|
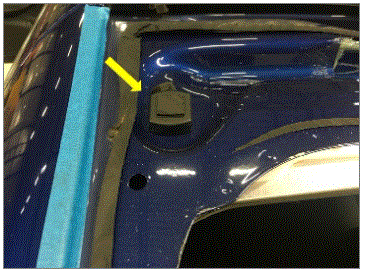 Courtesy of TESLA, INC.
|
- Connect GPS antenna onto LH liftgate harness
NOTE:
1x connector, apply tape as needed
Courtesy of TESLA, INC.
|
- Secure LH liftgate harness grommet onto body
NOTE:
1x grommet, Apply P-80 onto grommet for easier fit, Make sure its fully installed
Courtesy of TESLA, INC.
|
- Connect RH liftgate pinch strip sensor
NOTE:
1x connector, Route harness trough RH liftgate grommet opening
Courtesy of TESLA, INC.
|
- Install RH pinch strip grommet onto liftgate
NOTE:
1x grommet, Apply P-80 onto grommet for easier fit
Courtesy of TESLA, INC.
|
- Install RH rear liftgate pinch strip assembly onto liftgate
NOTE:
6x push clip
Courtesy of TESLA, INC.
|
- Connect LH liftgate pinch strip sensor
NOTE:
1x connector, Route harness trough LH liftgate grommet opening
Courtesy of TESLA, INC.
|
- Install LH pinch strip grommet onto liftgate
NOTE:
1x grommet, Apply P-80 onto grommet for easier fit
Courtesy of TESLA, INC.
|
- Install LH rear liftgate pinch strip assembly onto liftgate
NOTE:
6x push clip
Courtesy of TESLA, INC.
|
- Remove protective tape from RH side liftgate wire harness
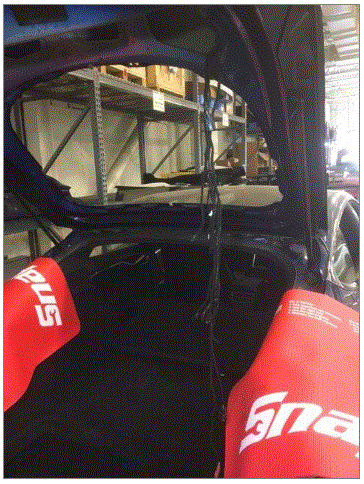 Courtesy of TESLA, INC.
|
- Remove protective tape from LH side liftgate wire harness
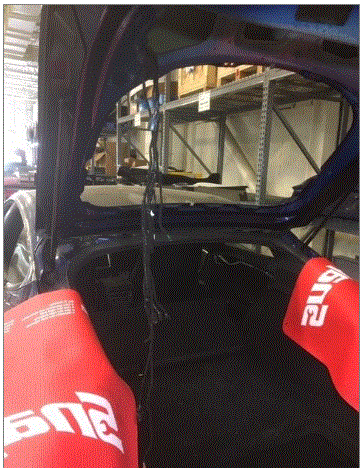 Courtesy of TESLA, INC.
|
- Install clips securing harnesses to liftgate assembly
NOTE:
13x fir tree clips, 1x edge clip
Courtesy of TESLA, INC.
|
Courtesy of TESLA, INC.
|
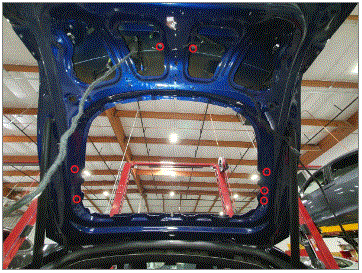
- Remove painted ground bolts from liftgate
NOTE:
7x bolts, 10mm, 9 N.m, Preparing for later mounting
 Courtesy of TESLA, INC.
|
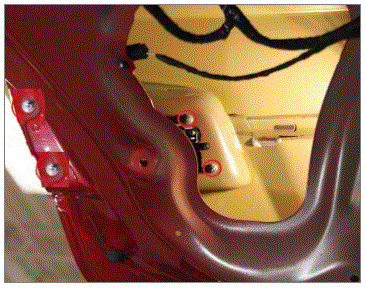
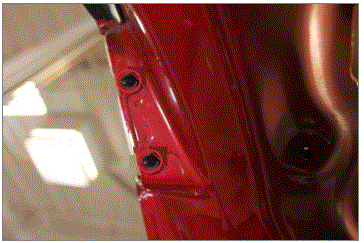
- Install RH reverse tail lamp onto liftgate
NOTE:
4x nuts, 8mm, 4 N.m, 2x rubber covers
Courtesy of TESLA, INC.
|
 Courtesy of TESLA, INC.
|
 Courtesy of TESLA, INC.
|
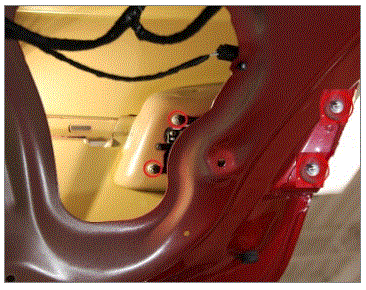
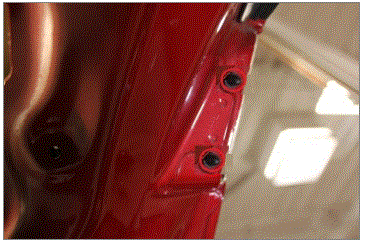
- Install LH reverse tail lamp onto liftgate
NOTE:
4x nuts, 8mm, 4 N.m, 2x rubber covers
Courtesy of TESLA, INC.
|
 Courtesy of TESLA, INC.
|
 Courtesy of TESLA, INC.
|
- Connect RH tail lamp
NOTE:
1x connector
Courtesy of TESLA, INC.
|
- Connect LH tail lamp
NOTE:
1x connector
Courtesy of TESLA, INC.
|
- Install RH lower bump onto liftgate
NOTE:
1x bump stop
Courtesy of TESLA, INC.
|
- Install LH lower bump onto liftgate
NOTE:
1x bump stop
Courtesy of TESLA, INC.
|
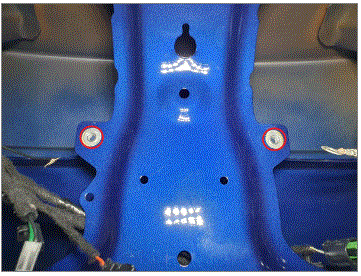
- Install liftgate grounding terminals
NOTE:
2x bolt, 10mm, 9 N.m, 2x ground terminals
 Courtesy of TESLA, INC.
|
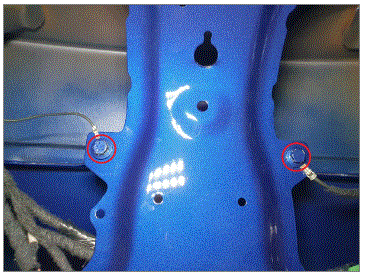 Courtesy of TESLA, INC.
|
- Install liftgate latch assembly onto liftgate
NOTE:
2x bolts, T30, 10 N.m
Courtesy of TESLA, INC.
|
- Connect liftgate latch
NOTE:
1x connector
Courtesy of TESLA, INC.
|
- Install liftgate latch emergency release cable onto rear liftgate
NOTE:
1x edge clip
Courtesy of TESLA, INC.
|
- Install emergency liftgate release cable tether onto end of release cable
NOTE:
Use new piece of butyl tape if old doesn't hold
Courtesy of TESLA, INC.
|
- Install rear liftgate emergency cable into place
NOTE:
1x edge clip, To avoid NVH issues make sure the cable is firmly secured
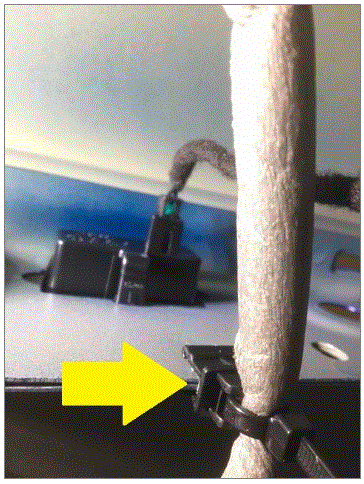 Courtesy of TESLA, INC.
|
- Install piece of dual lock onto rear liftgate
NOTE:
Install in area near emergency release cable, Used as an anchor for the emergency release cable
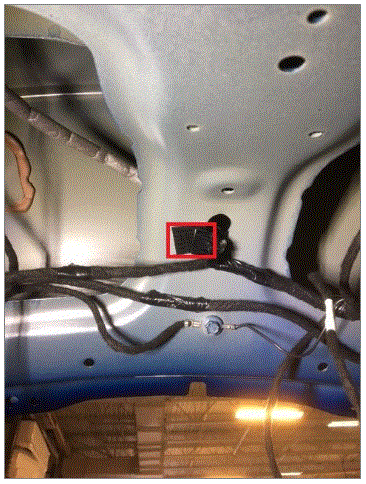 Courtesy of TESLA, INC.
|
- Install liftgate release button onto liftgate
NOTE:
1x connector
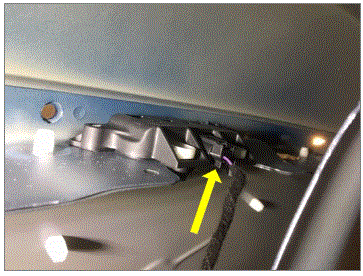 Courtesy of TESLA, INC.
|
- Install bolts securing liftgate release button to liftgate
NOTE:
2x bolts, 10mm, 3 N.m
Courtesy of TESLA, INC.
|
- Install RH license plate lamp onto liftgate
NOTE:
Make sure you hear the locking tab snap into place holding the plate light in place
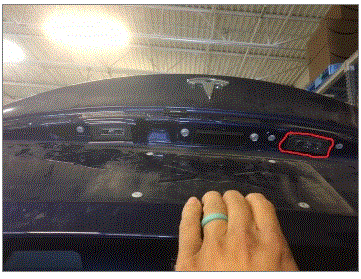 Courtesy of TESLA, INC.
|
- Connect RH license plate lamp
NOTE:
1x connector
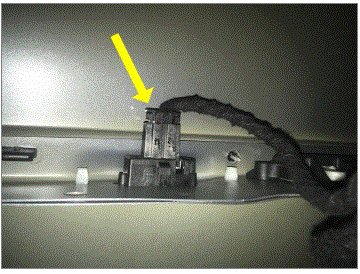 Courtesy of TESLA, INC.
|
- Install LH license plate lamp onto liftgate
NOTE:
Make sure you hear the locking tab snap into place holding the plate light in place
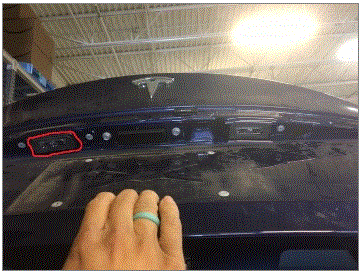 Courtesy of TESLA, INC.
|
- Connect LH license plate lamp
NOTE:
1x connector
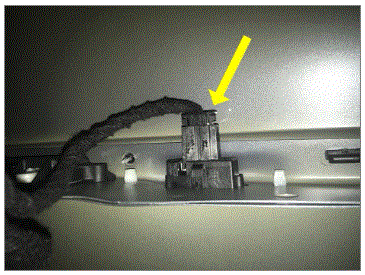 Courtesy of TESLA, INC.
|
- Install LH and RH liftgate drain plug
NOTE:
2x drain plug
Courtesy of TESLA, INC.
|
- Install rear view camera harness onto liftgate
NOTE:
1x edge clip
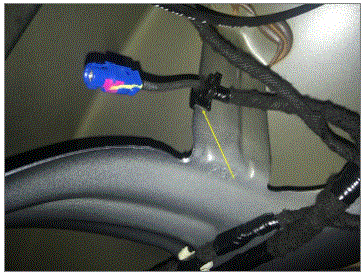 Courtesy of TESLA, INC.
|
- Install rear view camera into liftgate
NOTE:
1x grommet, Apply P-80 onto grommet for easier fit
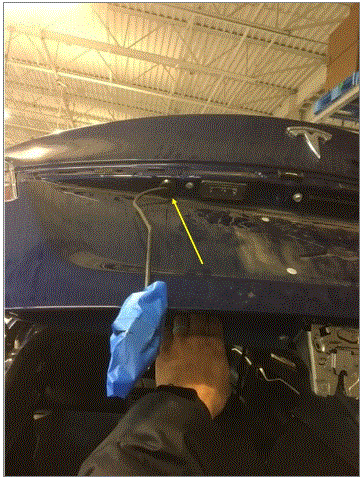 Courtesy of TESLA, INC.
|
- Connect rear view camera
NOTE:
1x connector 1x clip
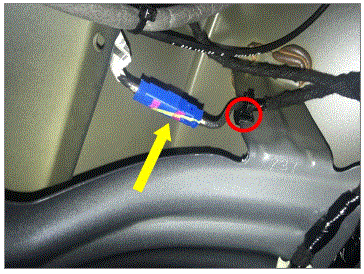 Courtesy of TESLA, INC.
|
- Remove protective tape from rear view camera
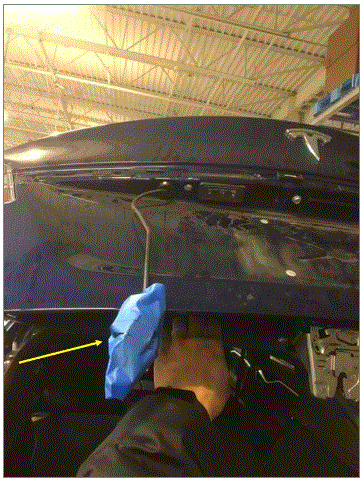 Courtesy of TESLA, INC.
|
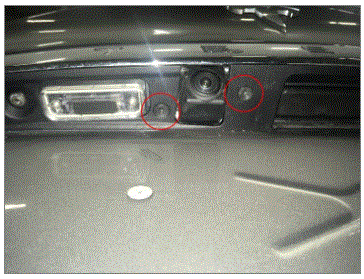
- Install bolts securing rear view camera onto bracket
NOTE:
2x bolt, T25, 2.4 N.m, Install new patched bolts, Thread the rear facing camera into the rear liftgate applique bracket
 Courtesy of TESLA, INC.
|
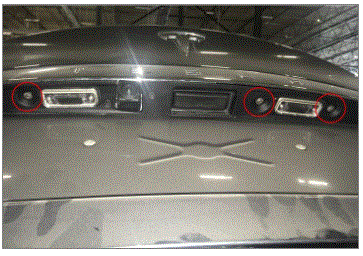
- Install screws securing bracket onto liftgate
NOTE:
3x screws, T20, 2.4 N.m
 Courtesy of TESLA, INC.
|
- Install RH liftgate wedge bumper onto liftgate
NOTE:
1x bolt, T30, 12 N.m, 1x cap
Courtesy of TESLA, INC.
|
Courtesy of TESLA, INC.
|
- Install LH liftgate wedge bumper onto liftgate
NOTE:
1x bolt, T30, 12 N.m, 1x cap
Courtesy of TESLA, INC.
|
Courtesy of TESLA, INC.
|
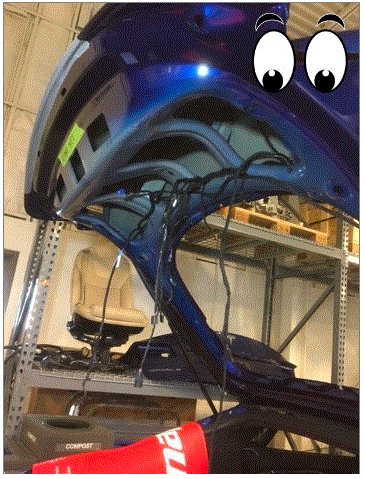
- Inspect that all harness clips are in place
NOTE:
Make sure that harness will not get damaged if the rear liftgate is closed
 Courtesy of TESLA, INC.
|
- Close liftgate
Courtesy of TESLA, INC.
|
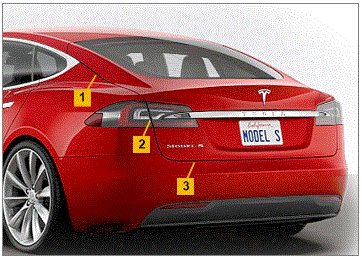
- Check gap and flush from liftgate to body
NOTE:
Reference gap and flush specification guide on service information, Adjust if needed, https://service.teslamotors.com/protected-doc/ModelS/TheoryOp/InspectionStandards/index_frames.html
 Courtesy of TESLA, INC.
|
- Torque nuts securing liftgate hinge to body
NOTE:
4x nuts, 10mm, 16 N.m, Torque from inside of the vehicle
Courtesy of TESLA, INC.
|
Courtesy of TESLA, INC.
|
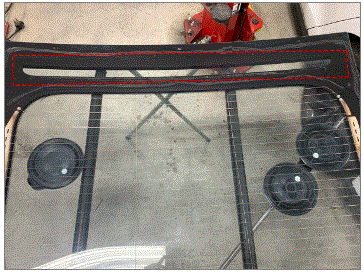
- Use an IPA wipe to clean CHMSL mounting location
NOTE:
Allow IPA to dry for at least one minute
 Courtesy of TESLA, INC.
|
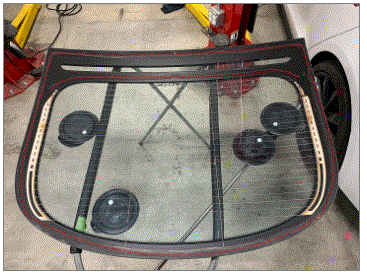
- Use an IPA wipe to clean urethane path on liftgate glass
NOTE:
Allow IPA to dry for at least one minute
 Courtesy of TESLA, INC.
|
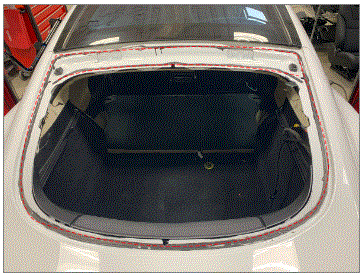
- Use an IPA wipe to clean urethane path on body
NOTE:
Allow IPA to dry for at least one minute
 Courtesy of TESLA, INC.
|
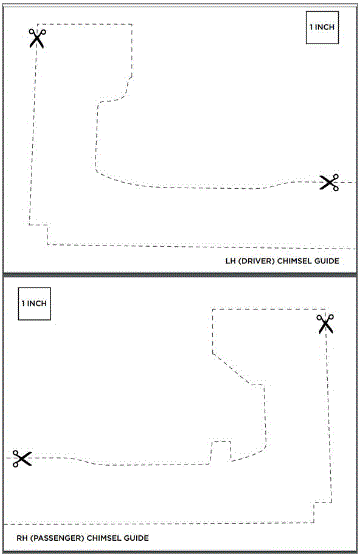
- Print out CHMSL template and cut it out
NOTE:
http://toolbox.teslamotors.com/media/attachments/shared/7741afaa-ded3-4e7b-b003-209c5678960a.pdf
 Courtesy of TESLA, INC.
|
- Place CHMSL templates on liftgate glass in upper corner of glass and secure template with tape
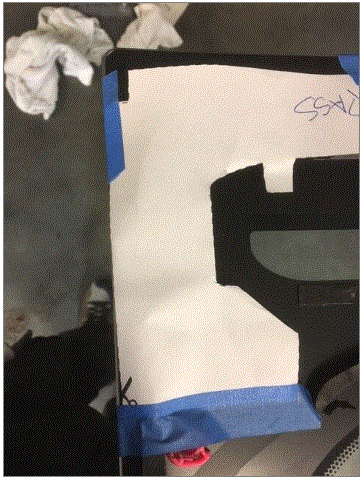 Courtesy of TESLA, INC.
|
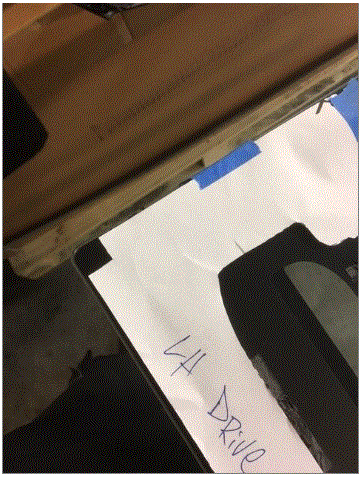 Courtesy of TESLA, INC.
|
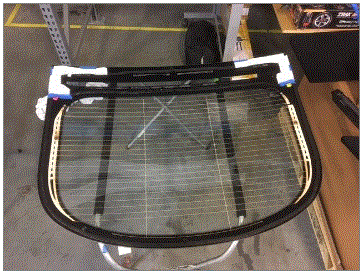 Courtesy of TESLA, INC.
|
- Reconnect the CHMSL to the harness in the center of the liftgate
NOTE:
1x connector
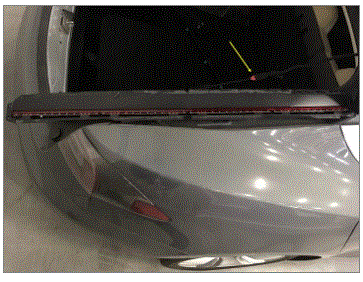 Courtesy of TESLA, INC.
|
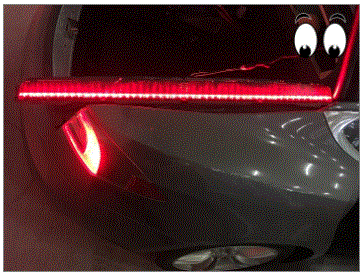
- Test if CHMSL is working correctly
NOTE:
Have an assistant depress the brake pedal, Ensure that the CHMSL lights up properly, If any of the LEDs have been damaged, Replace the CHMSL, If wire has been damaged repair wire following bulletin, https://service.teslamotors.com/protected-doc/ServiceBulletins/Internal/SI/SI-17-17-002_Electrical_Harness_Repair_R6.pdf
 Courtesy of TESLA, INC.
|
- Disconnect CHMSL assembly
NOTE:
1x connector
Courtesy of TESLA, INC.
|
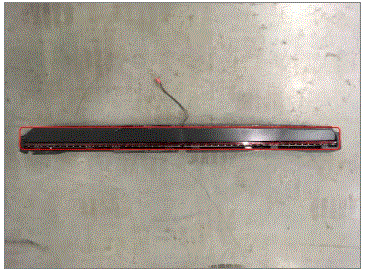
- Remove old double sided tape from CHMSL
NOTE:
Use glue remover
 Courtesy of TESLA, INC.
|
- Use an IPA wipe to clean double sided tape path on CHMSL assembly
NOTE:
Allow IPA to dry for at least one minute
Courtesy of TESLA, INC.
|
- Apply new double sided tape to CHMSL
Courtesy of TESLA, INC.
|
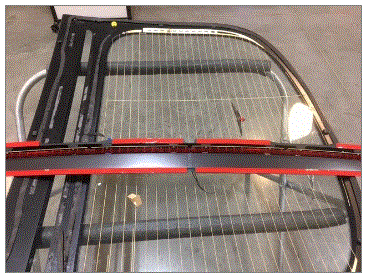
- Remove red tape covers from CHMSL
 Courtesy of TESLA, INC.
|
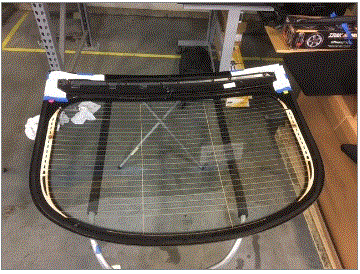
- Secure CHMSL to liftgate glass
NOTE:
Place in upper corners of template, Apply pressure to adhere 3M tape to liftgate glass
 Courtesy of TESLA, INC.
|
- Remove CHMSL templates from liftgate glass
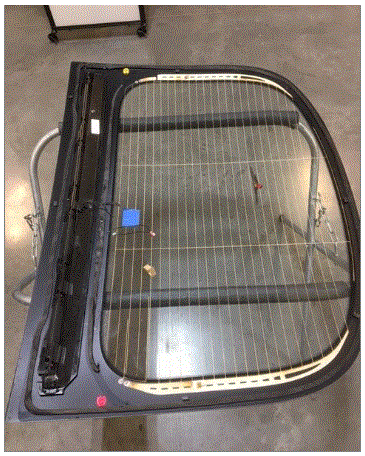 Courtesy of TESLA, INC.
|
- Secure CHMSL harness to liftgate glass
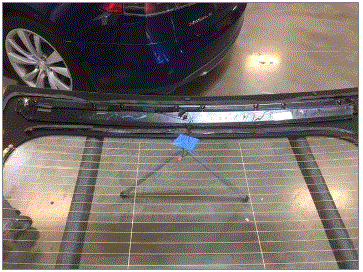 Courtesy of TESLA, INC.
|
- Secure double suction cup to outside of new rear liftgate glass
NOTE:
2x double suction cup handles, 1 on each side of glass
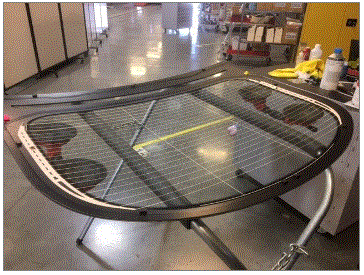 Courtesy of TESLA, INC.
|
- Flip over rear liftgate glass and install it onto vehicle
NOTE:
2x double suction cup handles, 1 on each side of glass, Recommend assistance
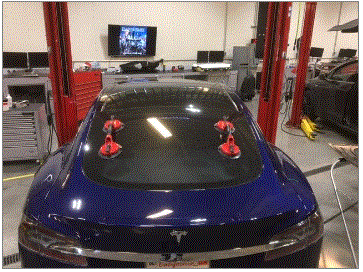 Courtesy of TESLA, INC.
|
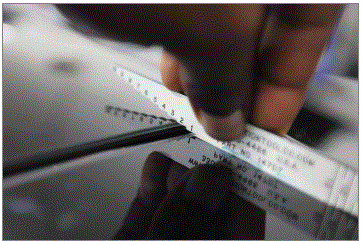
- Check gap and flush of liftgate glass
NOTE:
Make notes of any needed adjustments
 Courtesy of TESLA, INC.
|
- Remove rear liftgate glass
NOTE:
2x double suction cup handles, 1 on each side of glass
Courtesy of TESLA, INC.
|
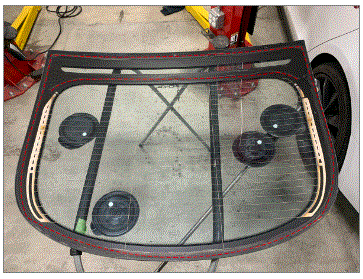
- Apply urethane primer to liftgate glass along urethane path
NOTE:
Allow primer to dry for 2 minutes before applying urethane
 Courtesy of TESLA, INC.
|
- Apply urethane primer to liftgate body along urethane path
NOTE:
Allow primer to dry for 2 minutes before applying urethane
Courtesy of TESLA, INC.
|
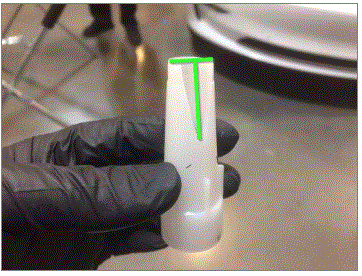
- Prepare caulking gun and urethane
NOTE:
Opening must be 8mm wide and 14mm tall
 Courtesy of TESLA, INC.
|
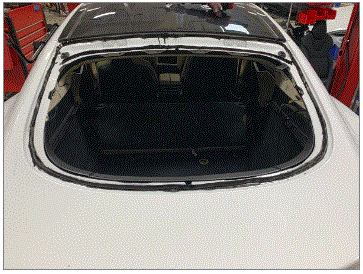
- Apply urethane to liftgate body following primer patch
NOTE:
Fill any gaps in urethane to ensure consistent bead
Courtesy of TESLA, INC.
|
 Courtesy of TESLA, INC.
|
- Flip over rear liftgate glass and install it onto vehicle
NOTE:
2x double suction cup handles, 1 on each side of glass, Recommend assistance
Courtesy of TESLA, INC.
|
- Check gap and flush of liftgate glass
NOTE:
Use tape to hold glass in place, allow glass 10 minutes of dry time before opening liftgate
Courtesy of TESLA, INC.
|
- Remove suction cups from liftgate glass
NOTE:
2x double suction cup handles
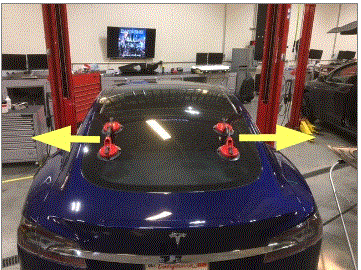 Courtesy of TESLA, INC.
|
- Clean adhesive from applique bracket and liftgate tail lamp assembly
NOTE:
Clean off residue, Recommend using your thumb to help roll off the adhesive, Allow 1 minute for IPA to dry
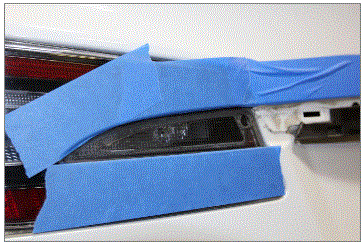 Courtesy of TESLA, INC.
|
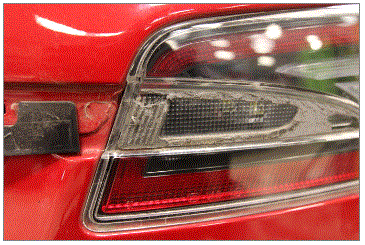 Courtesy of TESLA, INC.
|
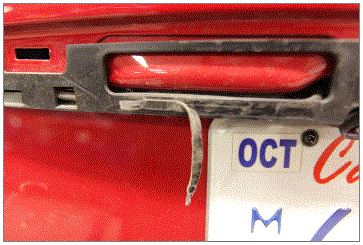 Courtesy of TESLA, INC.
|
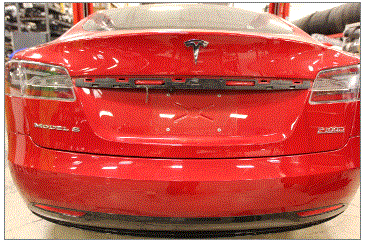 Courtesy of TESLA, INC.
|
- Install applique tape onto applique bracket and applique
NOTE:
Be careful not to cover the rear view camera
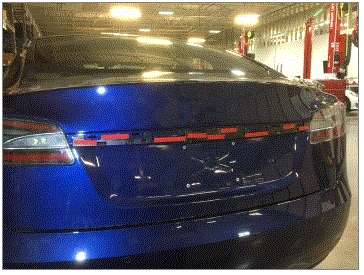 Courtesy of TESLA, INC.
|
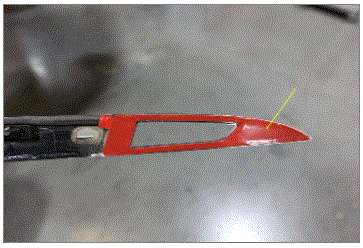 Courtesy of TESLA, INC.
|
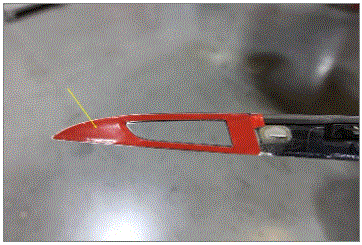 Courtesy of TESLA, INC.
|
- Remove adhesive backing from applique bracket and liftgate applique
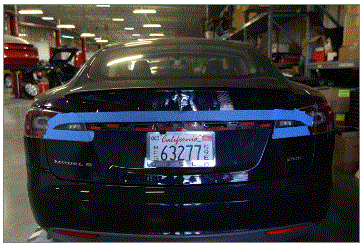 Courtesy of TESLA, INC.
|
Courtesy of TESLA, INC.
|
Courtesy of TESLA, INC.
|
- Install the liftgate applique
Courtesy of TESLA, INC.
|
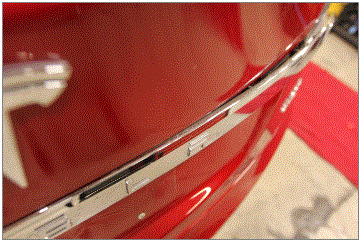 Courtesy of TESLA, INC.
|
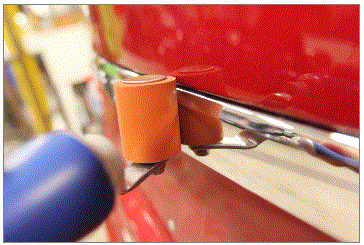 Courtesy of TESLA, INC.
|
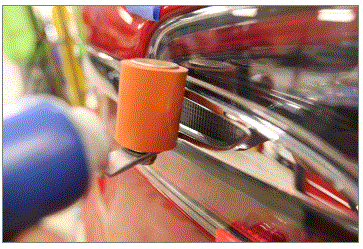 Courtesy of TESLA, INC.
|
Courtesy of TESLA, INC.
|
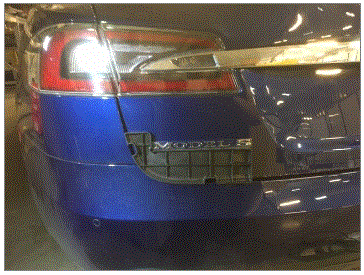
- Install "Model S" badge onto liftgate
NOTE:
Use an IPA wipe to clean area, Allow IPA to dry for at least one minute
 Courtesy of TESLA, INC.
|
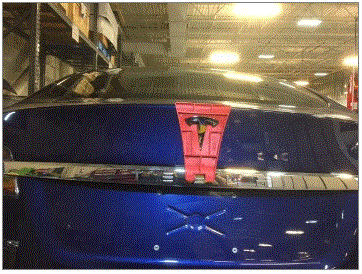
- Install Tesla "T" badge onto liftgate
NOTE:
Use an IPA wipe to clean area, Allow IPA to dry for at least one minute
 Courtesy of TESLA, INC.
|
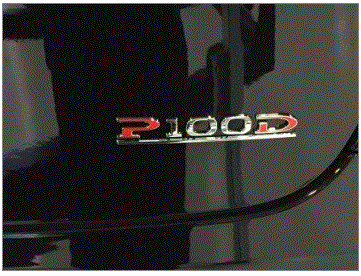
- Install "Battery Size" badge onto liftgate
NOTE:
Use an IPA wipe to clean area, Allow IPA to dry for at least one minute
 Courtesy of TESLA, INC.
|
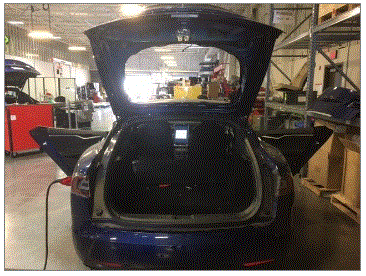
- Open liftgate
NOTE:
Allow for dry time
 Courtesy of TESLA, INC.
|
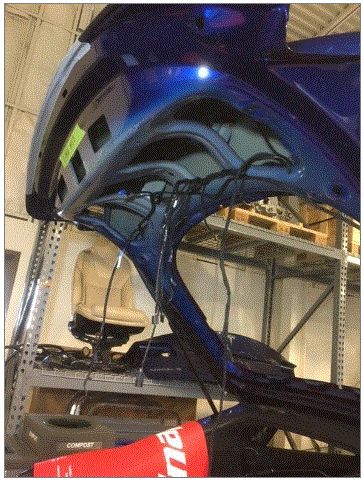
- Untuck the protected rear liftgate wire harness
 Courtesy of TESLA, INC.
|
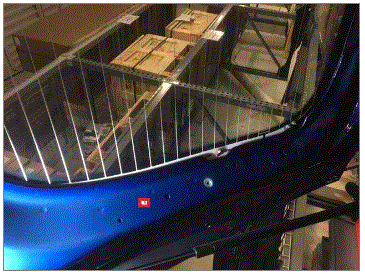
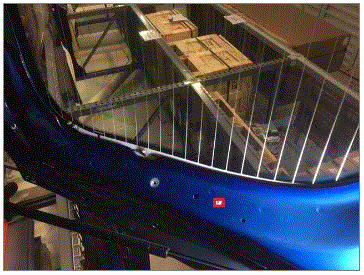
- Install LH and RH lower liftgate trim screw grommets
NOTE:
2x screw grommet
 Courtesy of TESLA, INC.
|
 Courtesy of TESLA, INC.
|
- Install RH RF filter
NOTE:
1x bolt, T30, 2 N.m, 2x connectors, Install new patch bolt
Courtesy of TESLA, INC.
|
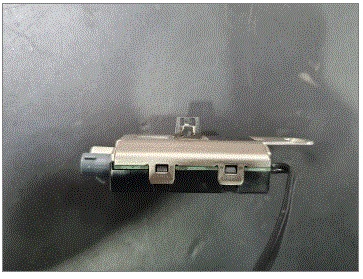
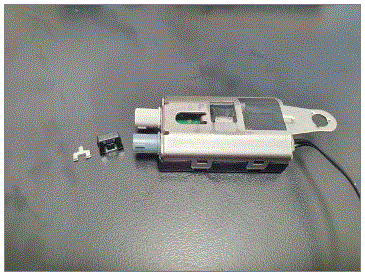
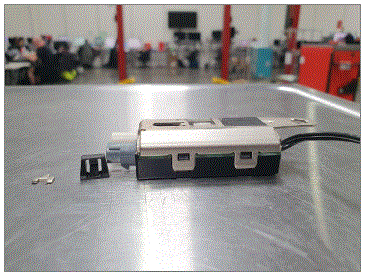
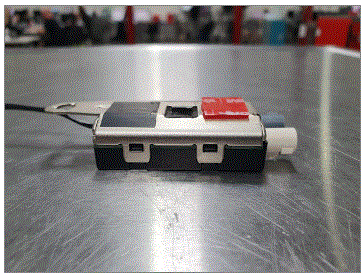
- Rework LH and RH antenna amplifiers
NOTE:
2x clips, 2x tabs, Remove clip from tab then using side cutter pliers cut off tab, File off excess material to create flush surface, Apply double sided tape onto antenna amplifiers, Careful damage antenna amplifiers when reworking
 Courtesy of TESLA, INC.
|
 Courtesy of TESLA, INC.
|
 Courtesy of TESLA, INC.
|
 Courtesy of TESLA, INC.
|
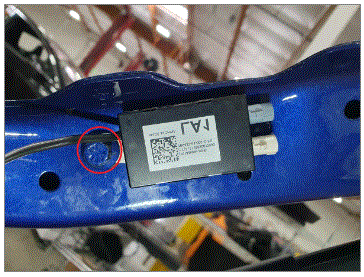
- Install RH antenna amplifier
NOTE:
1x screw, T25 / 10mm, 1.2 N.m, 2x connector
Courtesy of TESLA, INC.
|
 Courtesy of TESLA, INC.
|
- Connect CHMSL
NOTE:
1x connector
Courtesy of TESLA, INC.
|
- Install LH RF filter
NOTE:
1x bolt, T30, 2 N.m, 1x connector, Install new patched bolt
Courtesy of TESLA, INC.
|
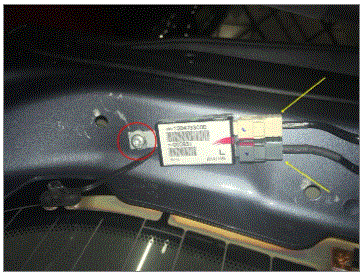
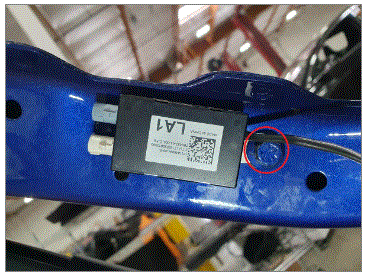
- Install LH antenna amplifier
NOTE:
Note 1x screw, T25 / 10mm, 1.2 N.m, 2x connectors
 Courtesy of TESLA, INC.
|
 Courtesy of TESLA, INC.
|
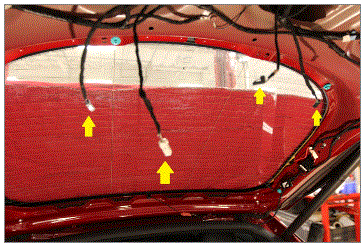
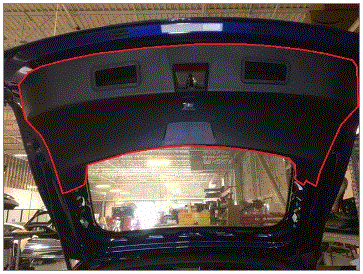
- Install lower liftgate trim
NOTE:
10x clips, 4x connectors, Number of connections may vary, Replace any damaged clips
 Courtesy of TESLA, INC.
|
 Courtesy of TESLA, INC.
|
- Install RH side liftgate trim
NOTE:
3x clips, Replace any damaged clips
Courtesy of TESLA, INC.
|
- Install LH side liftgate trim
NOTE:
3x clips, Replace any damaged clips
Courtesy of TESLA, INC.
|
- Install upper liftgate trim
NOTE:
4x clips, Replace any damaged clips
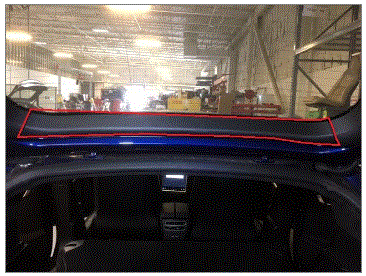 Courtesy of TESLA, INC.
|
- Install parcel shelf
Courtesy of TESLA, INC.
|
- Install trunk load floor
Courtesy of TESLA, INC.
|
- Install rear portion of headliner into position and clip into place
NOTE:
5x clips, 3x velcro strips, Replace any damaged or missing clips
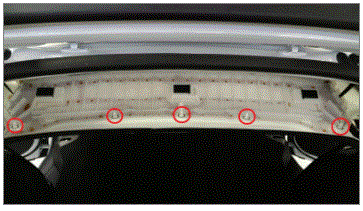 Courtesy of TESLA, INC.
|
- Install bolt securing headliner and support strap at LH C-pillar
NOTE:
1x bolt, 8mm, 10 N.m
Courtesy of TESLA, INC.
|
- Install LH C-pillar upper trim
NOTE:
4x clips
Courtesy of TESLA, INC.
|
Courtesy of TESLA, INC.
|
- Install LH rear C-pillar trim
NOTE:
1x screw, T25, 3 N.m, 4x clips
Courtesy of TESLA, INC.
|
Courtesy of TESLA, INC.
|
- Install bolt securing headliner and support strap at RH C-pillar
NOTE:
1x bolt, 8mm, 10 N.m
Courtesy of TESLA, INC.
|
- Install RH upper C-pillar trim
NOTE:
4x clips
Courtesy of TESLA, INC.
|
Courtesy of TESLA, INC.
|
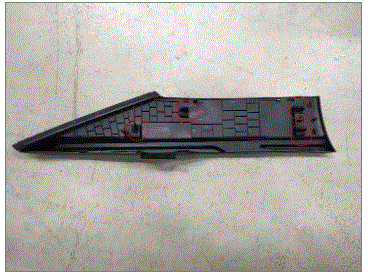
- Install RH rear C-pillar trim
NOTE:
Note 1x screw, T25, 3 N.m, 4x clips
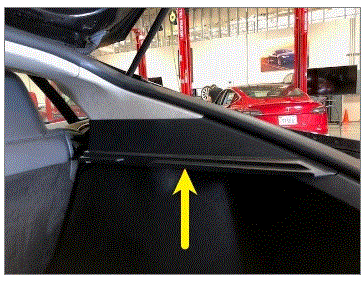 Courtesy of TESLA, INC.
|
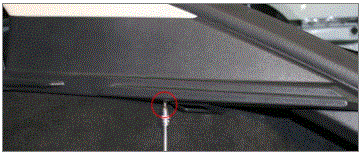 Courtesy of TESLA, INC.
|
 Courtesy of TESLA, INC.
|
- Install liftgate pull cups into rear liftgate
NOTE:
1x connector, If equipped with power liftgate
Courtesy of TESLA, INC.
|
Courtesy of TESLA, INC.
|
- Close liftgate
Courtesy of TESLA, INC.
|
- Fold 60 and 40 seat into vertical position
Courtesy of TESLA, INC.
|
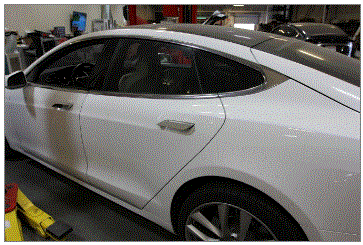
- Close all doors
 Courtesy of TESLA, INC.
|
- Return RH front seat to original position
Courtesy of TESLA, INC.
|
- Return LH front seat to original position
NOTE:
Utilize driver profile settings to return customer seat settings if saved
Courtesy of TESLA, INC.
|
- Raise all four windows
Courtesy of TESLA, INC.
|
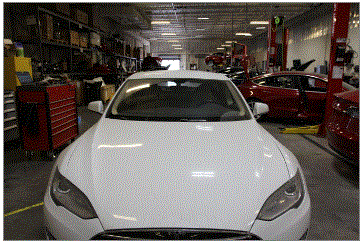
- Close both front doors
 Courtesy of TESLA, INC.
|