ECM Control Relay (Accent, ELANTRA & TIBURON)
- Turn ignition off. Disconnect ECM control relay harness connector and remove relay. Relay is mounted to left front pillar, near passenger compartment relay box. Check for continuity between relay terminals No. 2 and 4. See Fig 1. If continuity exists, go to next step. If continuity does not exist, replace ECM control relay.
- Using a fused jumper wire, apply battery voltage to relay terminal No. 4. Using another jumper wire, connect relay terminal No. 2 to ground. Check for continuity between relay terminals No. 1 and 5, and between terminals No. 3 and 5. If continuity exists, go to next step. If continuity does not exist, replace ECM control relay.
- Remove battery voltage and ground from ECM control relay. Check for continuity between relay terminals No. 1 and 5, and between terminals No. 3 and 5. If continuity does not exist, go to next step. If continuity exists, replace ECM control relay.
- Turn ignition off. Measure voltage between ground and ECM control relay harness connector terminals No. 4 (White wire) and 5 (White wire). If battery voltage is present, go to next step. If battery voltage is not present, repair open or short in White wire between relay and Blue FUSEABLE LINK 1 (20-amp) located in engine compartment relay and fuse box. If White wire is okay, go to next step.
- Remove Blue FUSIBLE LINK 1 (20-amp) located in engine compartment relay and fuse box. Check continuity across fusible link. If continuity exists, reinstall fusible link. If continuity does not exist, replace fusible link and retest.
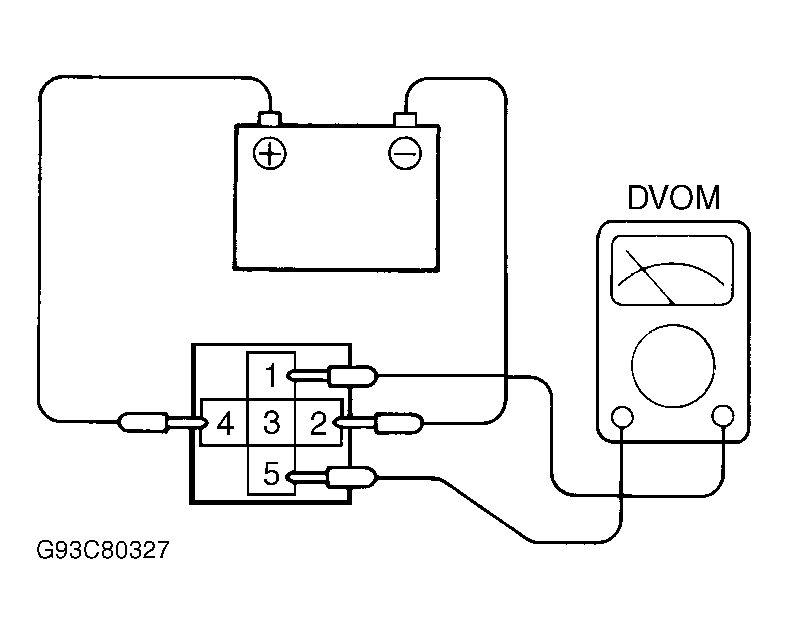 Courtesy of HYUNDAI MOTOR CO.