Steering Linkage Outer Tie Rod Replacement
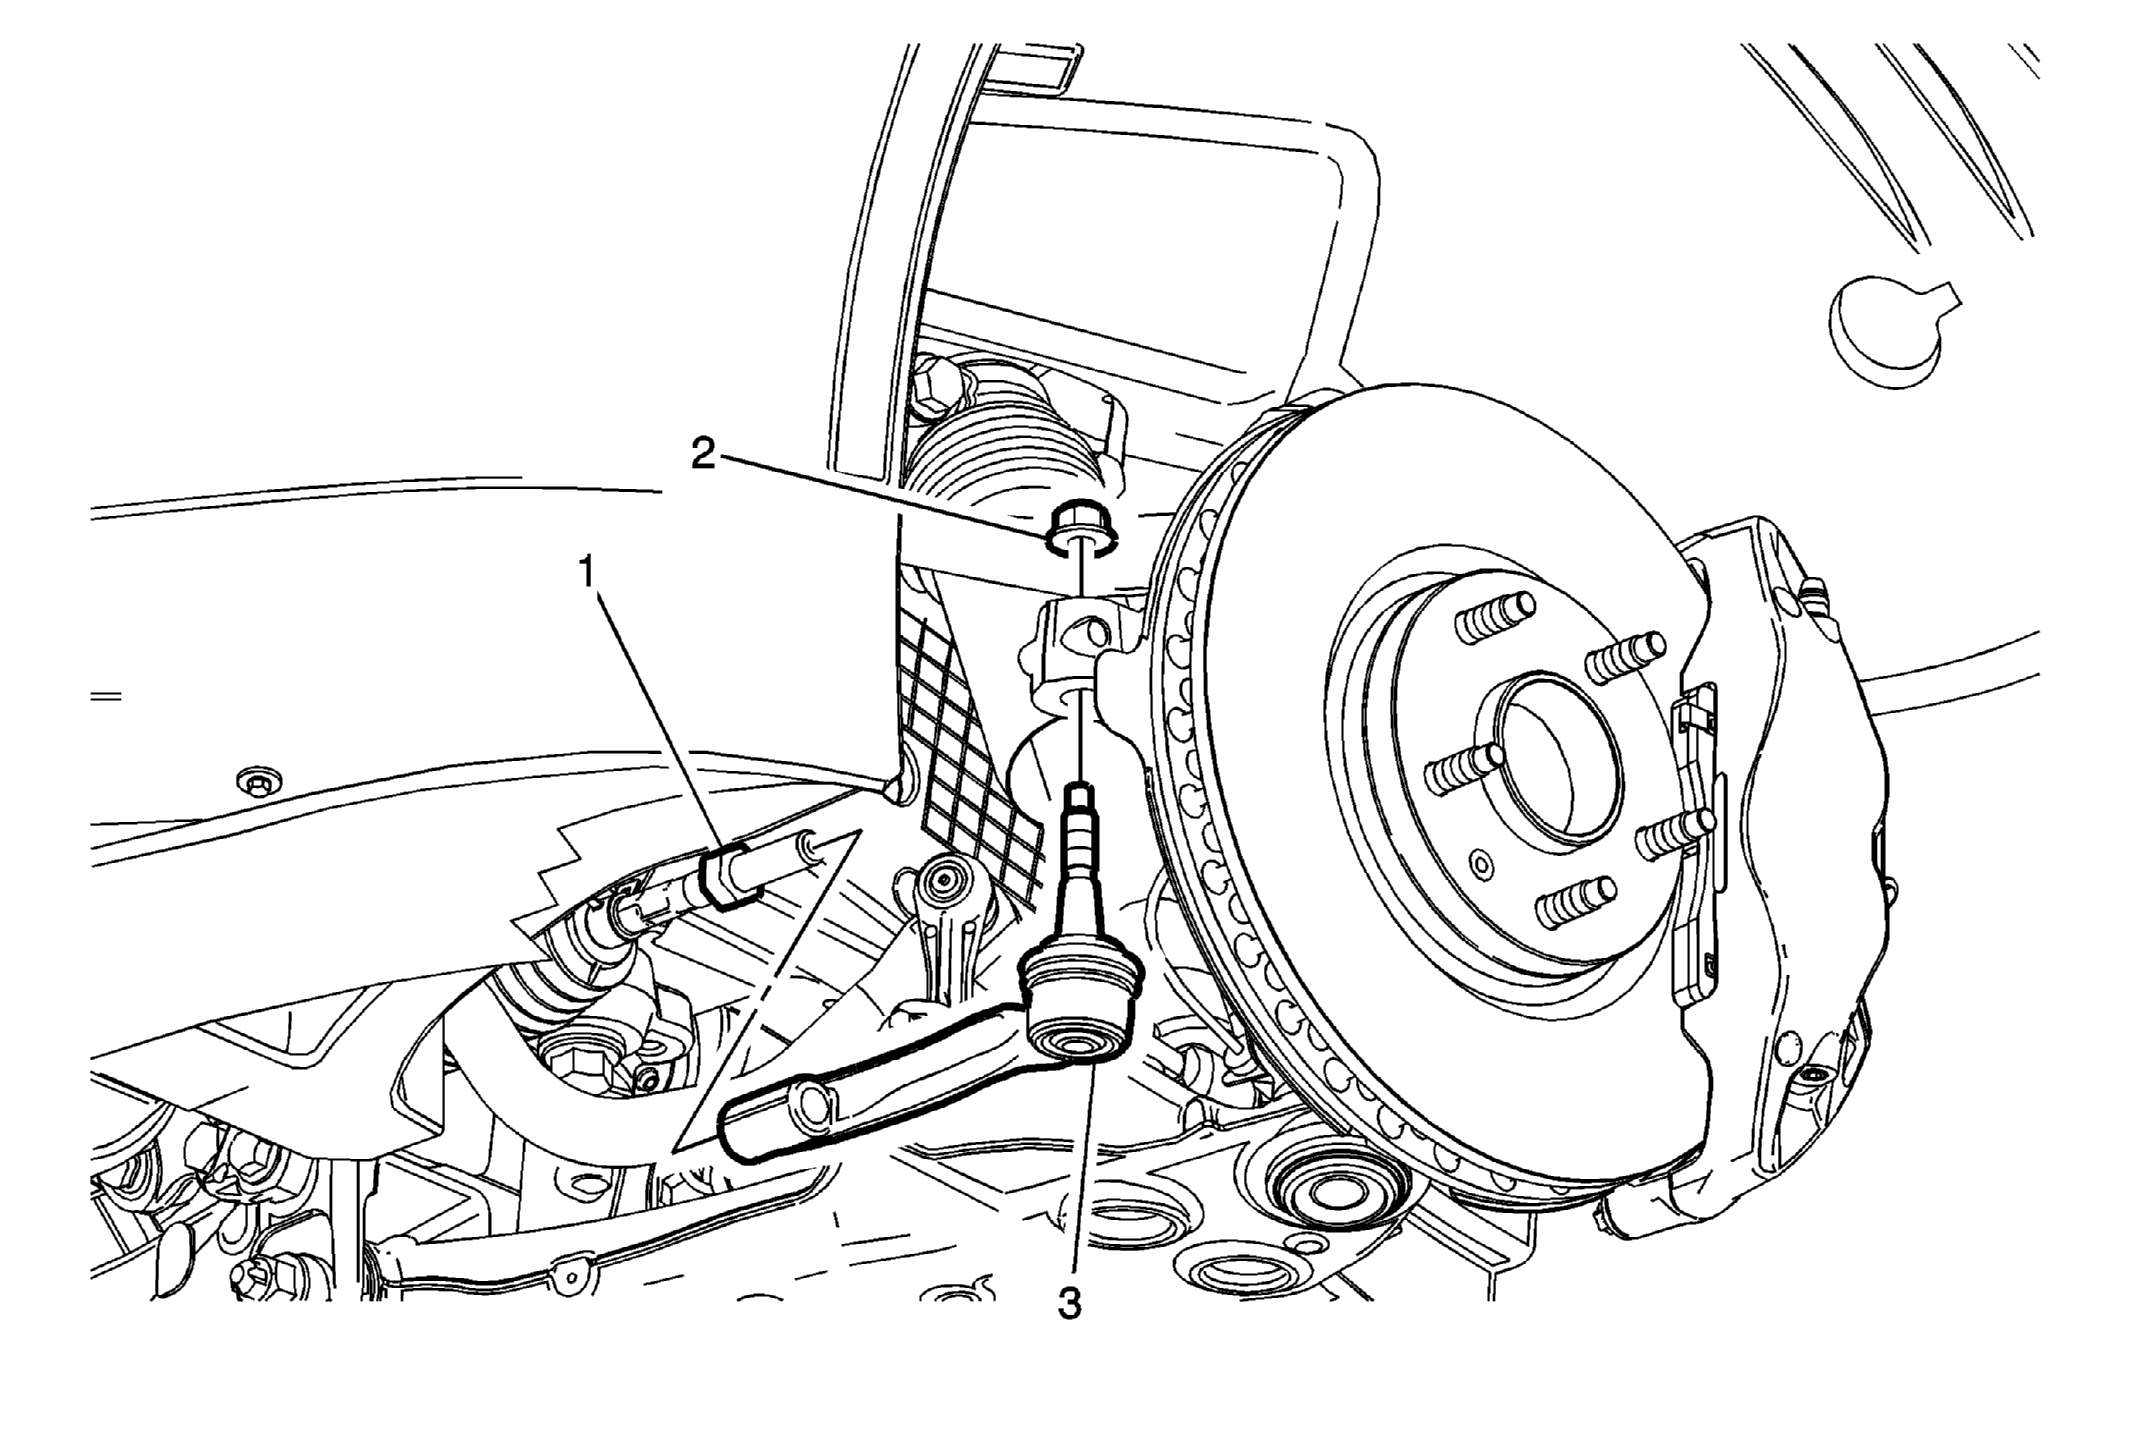 Courtesy of GENERAL MOTORS COMPANY
Steering Linkage Outer Tie Rod Replacement
| Callout |
Component Name |
|
Preliminary Procedures
- Raise and support the vehicle. Refer to Lifting and Jacking the Vehicle
.
- Remove the front tire and wheel assembly. Refer to Tire and Wheel Removal and Installation
.
|
| 1 |
Steering Linkage Inner Tie Rod Nut
Procedure
- Place match marks on the inner tie rod nut and the inner tie rod.
- During installation, align the match marks.
- Do not tighten the inner tie rod nut during installation. Tighten the nut after adjusting the front toe.
Tighten
75 N.m (55 lb ft) |
| 2 |
Steering Linkage Outer Tie Rod Nut
Tighten
30 N.m (26 lb ft) + 120 degrees |
| 3 |
Steering Linkage Outer Tie Rod
CAUTION:
Do not free the ball stud by using a pickle fork or a wedge-type tool. Damage to the seal or bushing may result.
Procedure
- Use the J-42188
separator to disconnect the outer tie rod from the steering knuckle.
- Clean the tapered surface of the steering knuckle.
- Inspect the inner tie rod for bent or damaged threads and replace the inner tie rod if necessary. Refer to Steering Linkage Inner Tie Rod Replacement (Left Side) , Steering Linkage Inner Tie Rod Replacement (Right Side) .
- Measure and adjust the front toe. Refer to Wheel Alignment - Steering Wheel Angle and/or Front Toe Adjustment
.
Special Tools
J-42188
Ball Joint Separator
For equivalent regional tools, refer to Special Tools . |