Windshield Wiper Arm Replacement
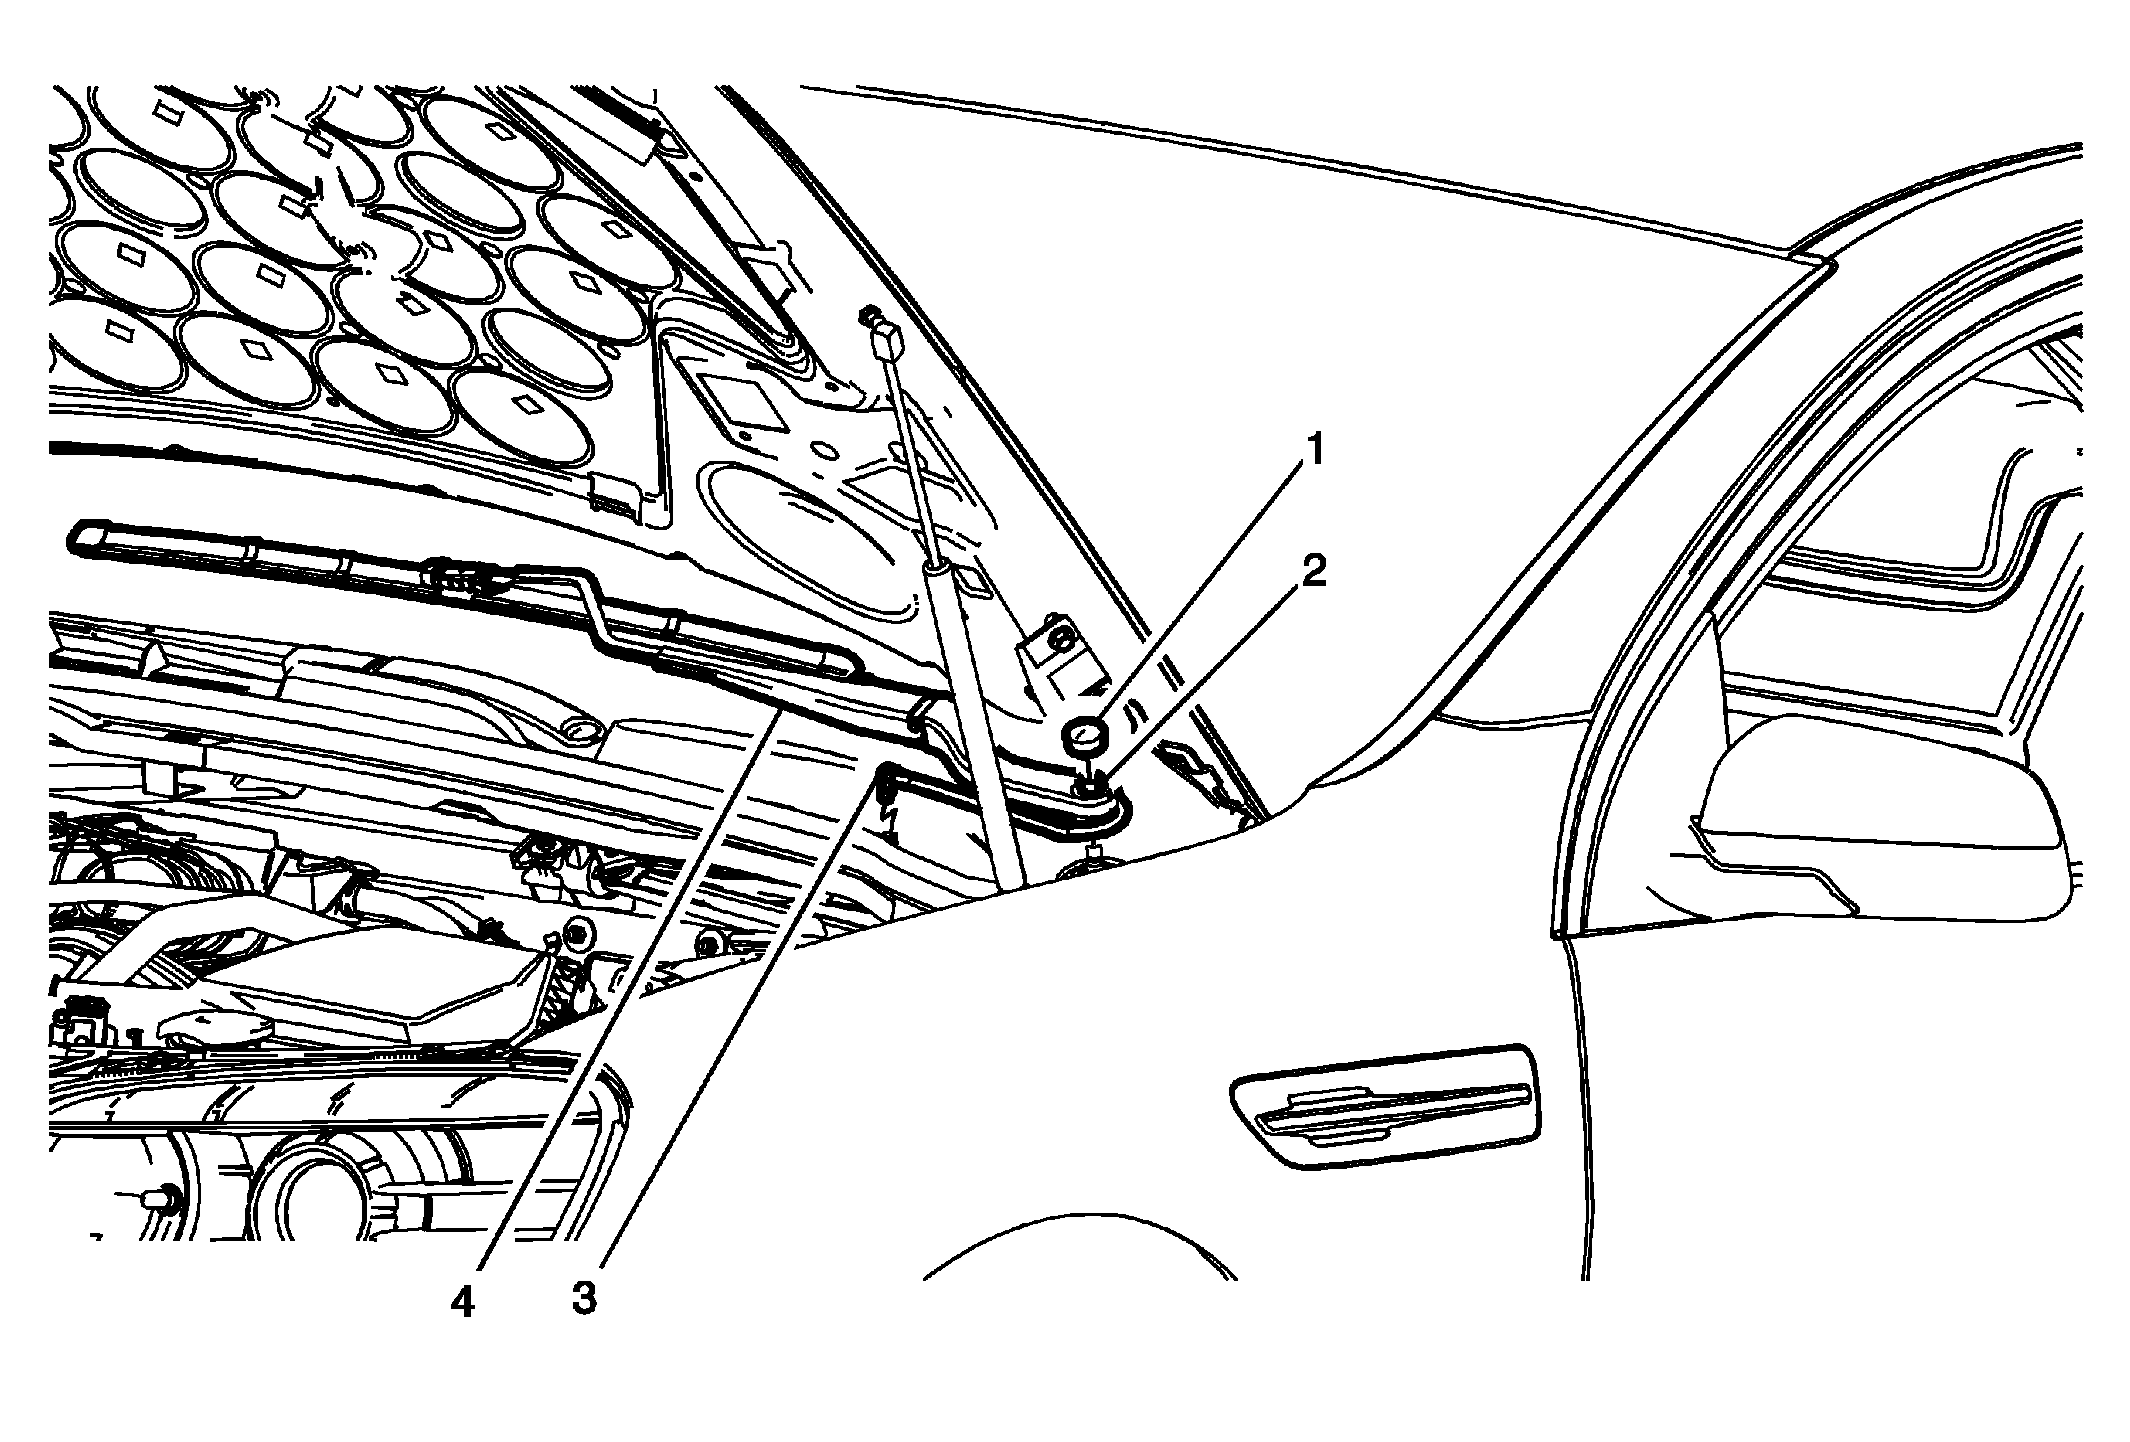 Courtesy of GENERAL MOTORS CORP.
Windshield Wiper Arm Replacement
| Callout |
Component Name |
Preliminary Procedure
Open and support the hood assembly. |
| 1 |
Windshield Wiper Arm Nut Cover
Procedure
Use a small flat-bladed tool to release the wiper arm nut cover from the windshield wiper arm. |
| 2 |
Windshield Wiper Arm Nut
Tighten
35 N.m(26 lb ft) |
| 3 |
Windshield Washer Nozzle Hose End Procedure
- Be careful not to damage the wiper arm hose elbow going into the air inlet grille panel grommet.
- Remove the washer hose elbow from the air inlet panel grommet.
- Route the washer hose counter-clockwise around the backside of the windshield wiper arm when installing.
|
| 4 |
Windshield Wiper Arm Procedure
- Use a soft wire brush and clean the knurls on the wiper motor pivot shaft.
- Install the wiper arm onto the wiper motor pivot shaft and flex the arm downward towards the windshield.
- Use the following measurements when setting the windshield wiper blade tip height.
- For the driver side blade tip, set at 59 mm (2.23 in) from the top edge of the air inlet panel.
- For the passenger side blade tip, set at 29 mm (1.14 in) from the top edge of the air inlet panel.
- Set the height and hold the windshield wiper blade to the lower windshield blackout area while torquing the nut.
|