4X4 Removal
- Turn the wheel to the straight ahead position and turn the ignition switch to the OFF position.
- Remove the wheel and tire assemblies.
- Remove the fluid cooler; see POWER STEERING FLUID COOLER REMOVAL/INSTALLATION
.
- Remove the four air deflector retaining screws.
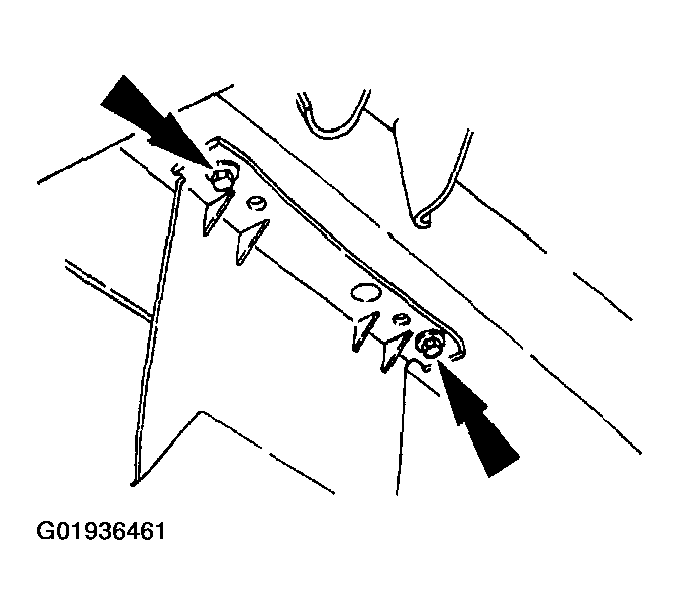 Courtesy of MAZDA MOTORS CORP.
- Pull downward on the air deflector to disengage the retaining pins.
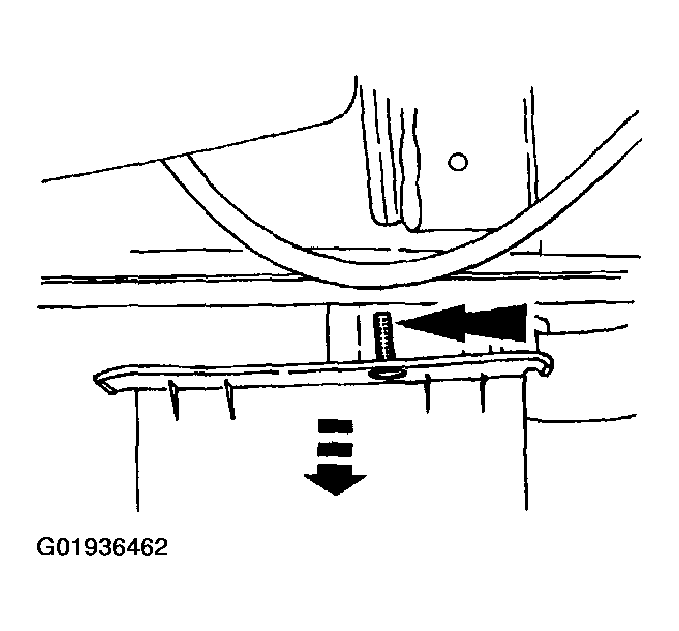 Courtesy of MAZDA MOTORS CORP.
- Loosen the LH tie rod jam nut.
- Remove and discard the cotter pins and nuts.
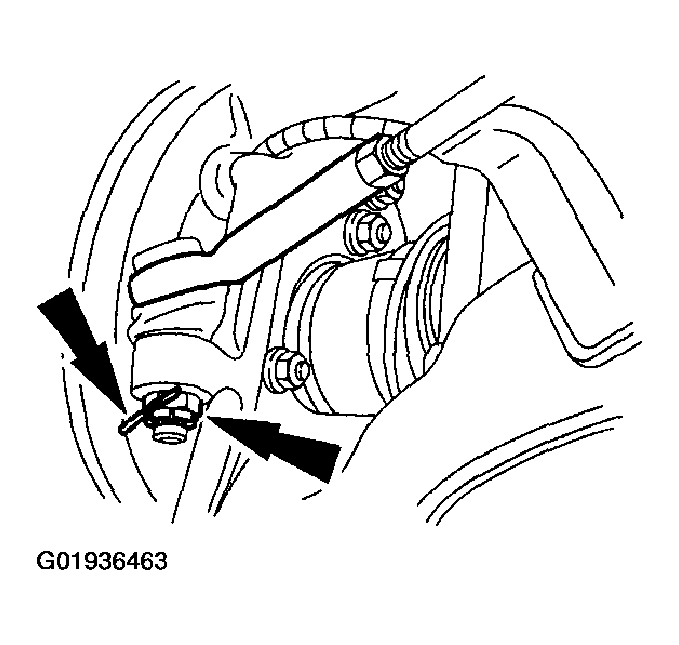 Courtesy of MAZDA MOTORS CORP.
CAUTION:
- Do not damage the tie-rod boot when installing the special tool.
NOTE:
- Remove the adapter from the ball end of the special tool. Apply a small amount of grease to the tie-rod end stud and the ball of the special tool.
- Using the special tool, separate the tie rod ends from the wheel knuckles.
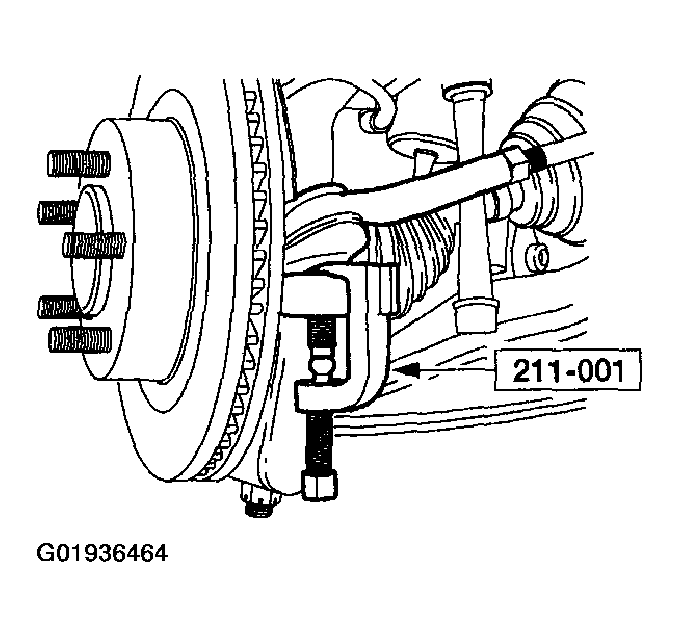 Courtesy of MAZDA MOTORS CORP.
- Remove the LH tie rod end.
- Count and record the number of turns required to remove the tie rod end.
- Remove front stabilizer bar nut and washer assembly. See FRONT SUSPENSION COMPONENTS
.
- Note or mark the driver side end of the stabilizer bar for correct installation.
CAUTION:
- Do not allow the intermediate shaft to rotate while it is disconnected from the steering gear or damage to the clock-spring can result. If there is evidence that the intermediate shaft has rotated, the clockspring must be removed and recentered. For additional information, see CLOCKSPRING
.
- Remove the pinch bolt and detach the intermediate shaft from the gear.
- Discard the bolt.
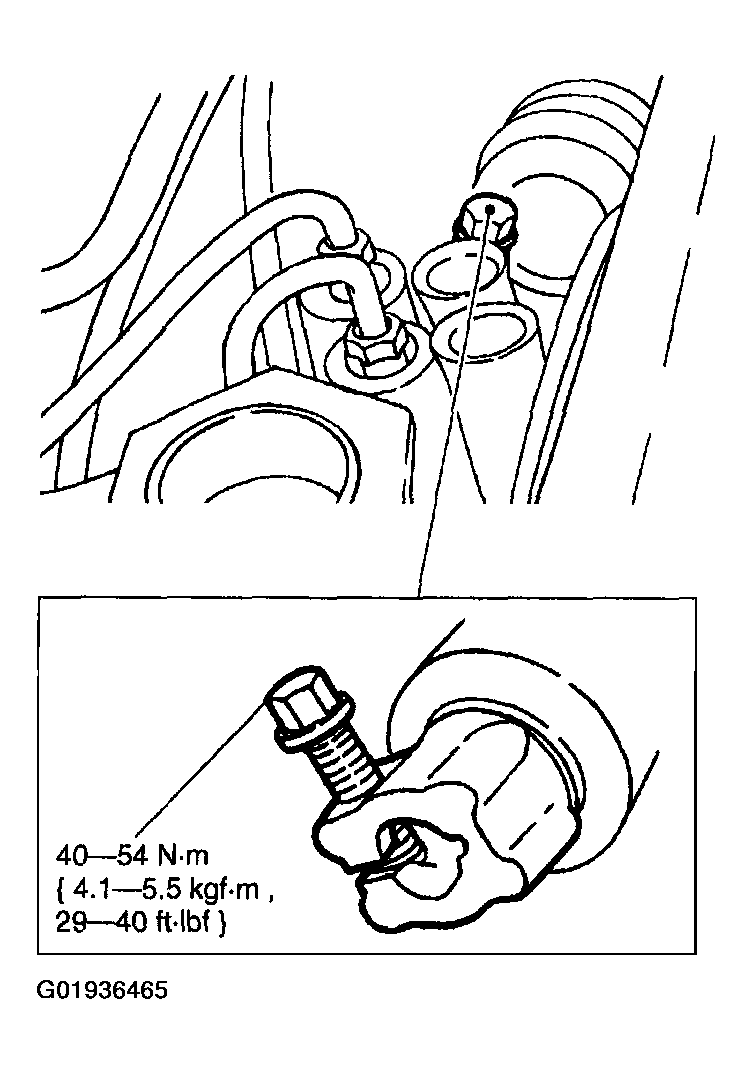 Courtesy of MAZDA MOTORS CORP.
- Remove the nut and disconnect the lines.
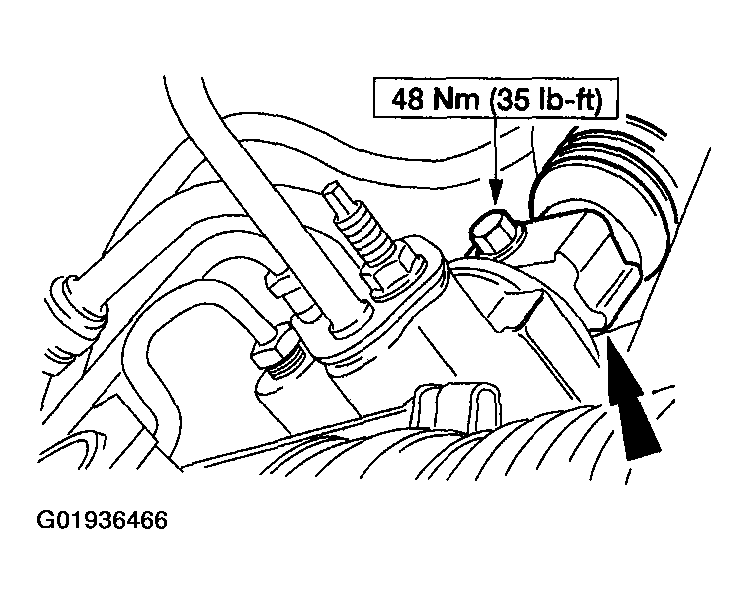 Courtesy of MAZDA MOTORS CORP.
- Plug or cap the power steering return hose, power steering pressure hose and the steering gear ports to prevent entry of dirt.
CAUTION:
- Hold the tops of the steering gear to crossmember stud bolts to avoid damaging the steering gear fluid transfer tubes.
- Remove the nuts.
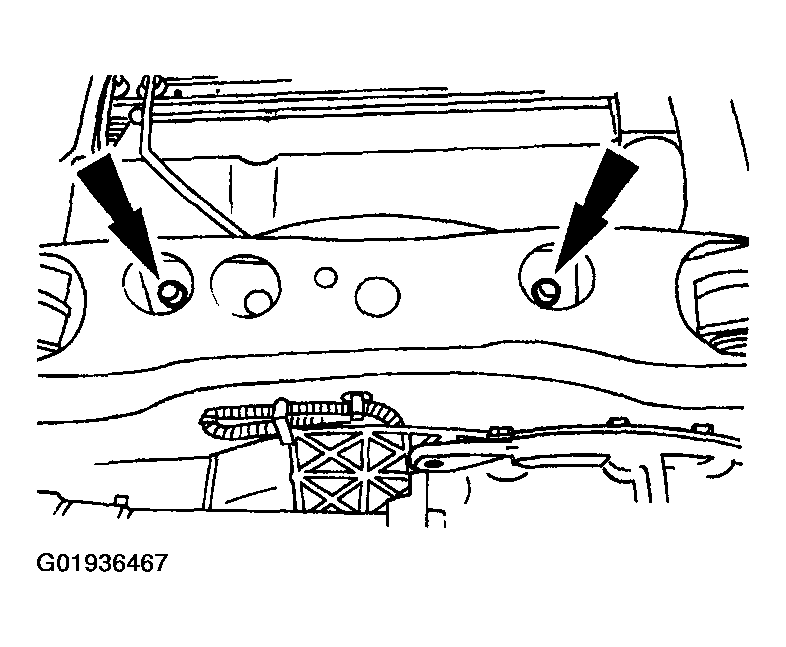 Courtesy of MAZDA MOTORS CORP.
- Remove the mounting stud, nut, washer and stop assemblies.
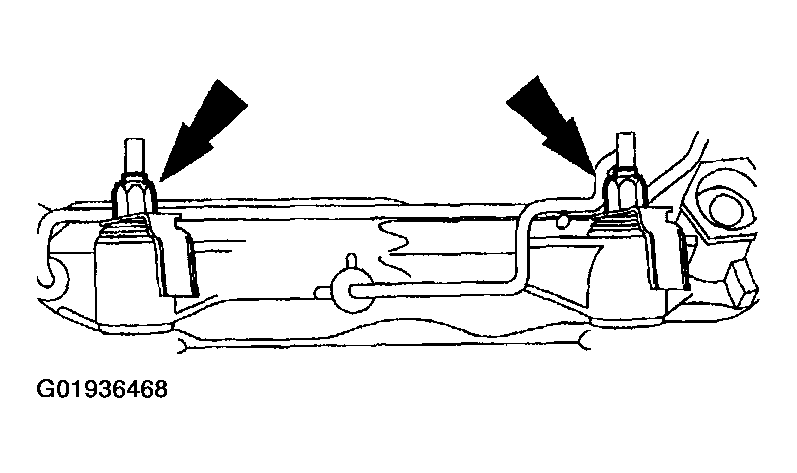 Courtesy of MAZDA MOTORS CORP.
- Remove the steering gear to crossmember bushings.
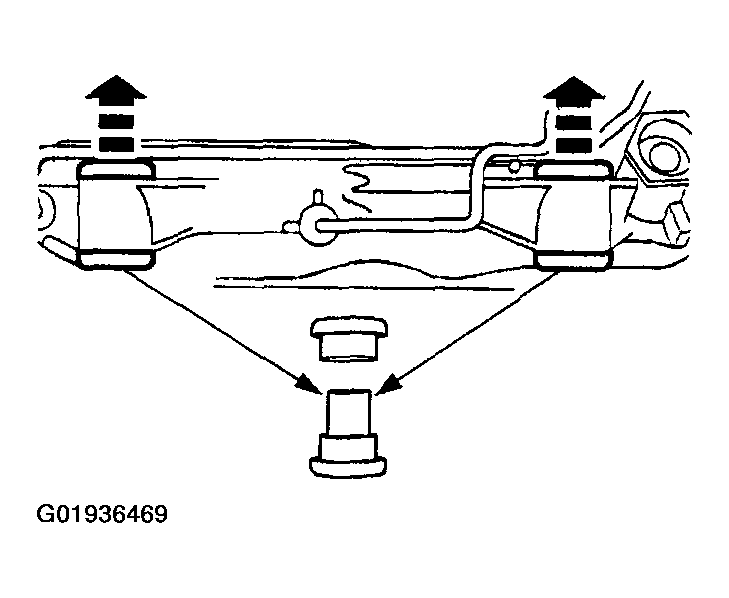 Courtesy of MAZDA MOTORS CORP.
- Rotate the steering gear control valve housing toward the front of the vehicle.
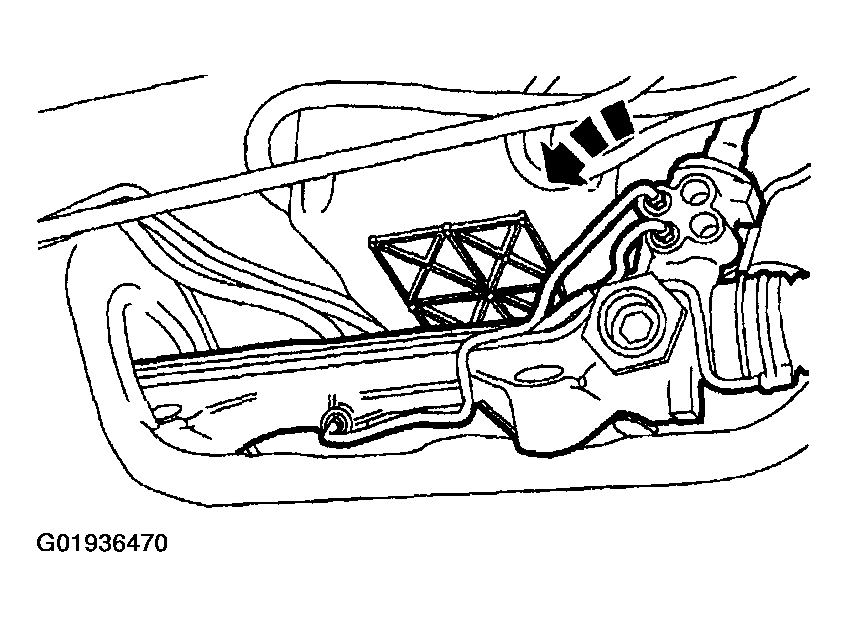 Courtesy of MAZDA MOTORS CORP.
- Turn the steering gear input shaft to the right until the stop is reached.
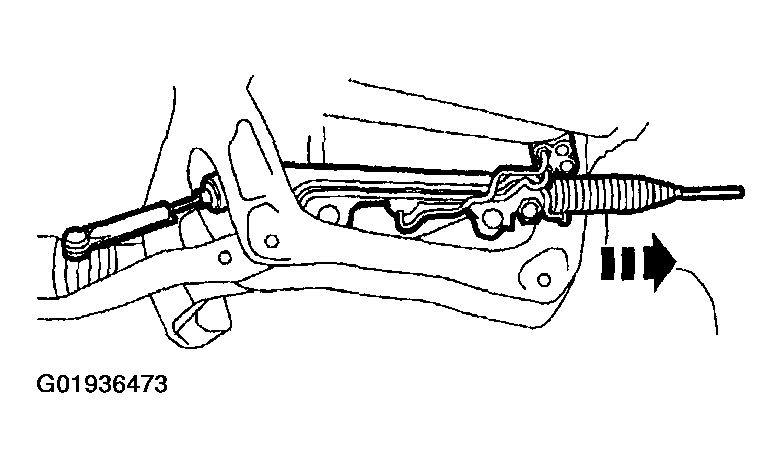
- Move the steering gear as far to the RH side of the vehicle as possible.
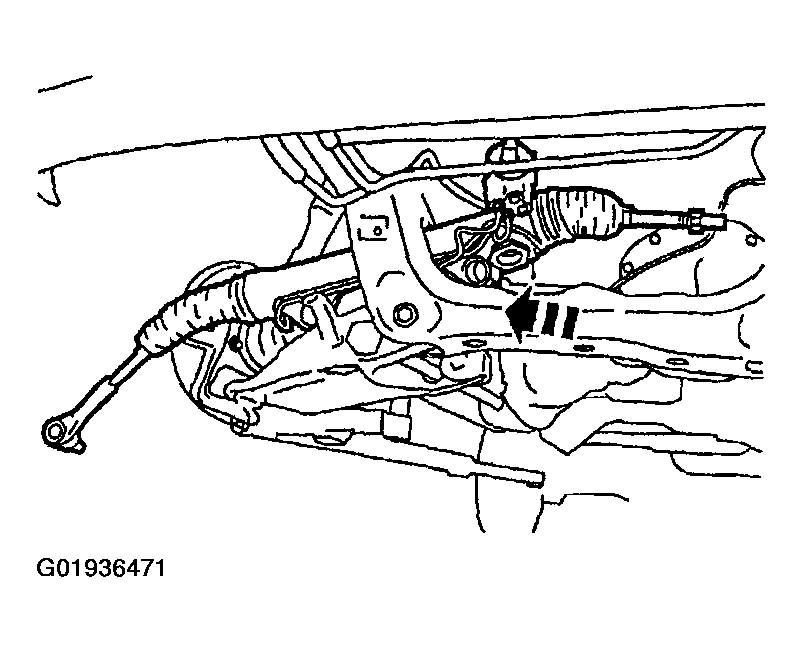 Courtesy of MAZDA MOTORS CORP.
- Move the LH wheel spindle tie-rod forward to clear the frame crossmember.
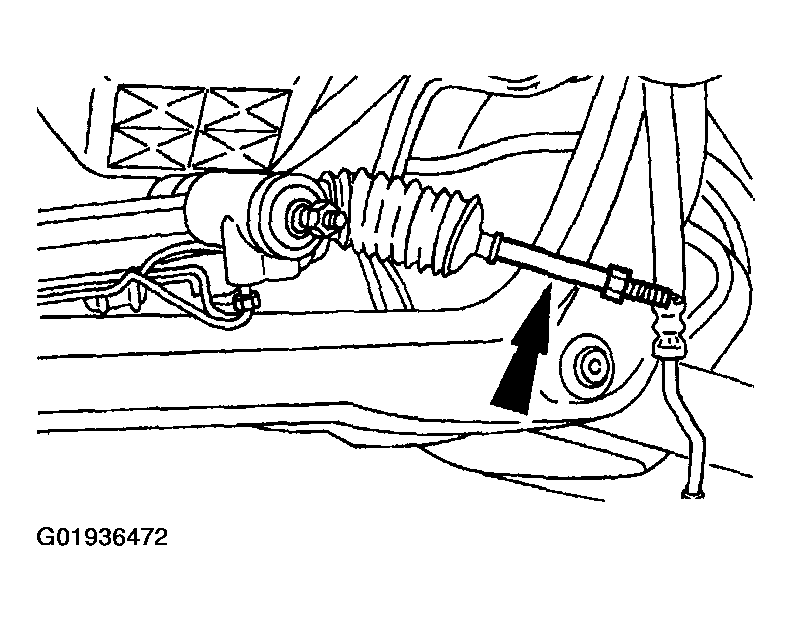 Courtesy of MAZDA MOTORS CORP.
- Remove the steering gear from the vehicle.
 Courtesy of MAZDA MOTORS CORP.