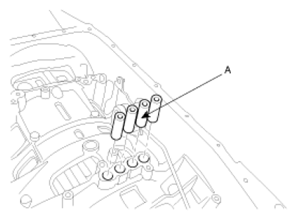
- Insert the four oil seal (A).
CAUTION:
Must use new ones when reassembled.
 Courtesy of HYUNDAI MOTOR CO.
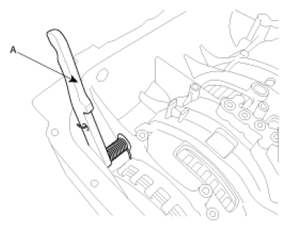
- Install the spring and ratchet (A) by inserting the guide pin.
 Courtesy of HYUNDAI MOTOR CO.
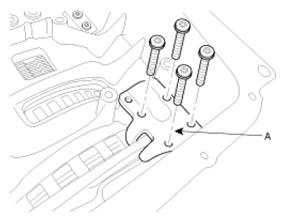
- Install the guide plate (A) by installing the special bolts (10ea) with TORX wrench (T27).
 Courtesy of HYUNDAI MOTOR CO.
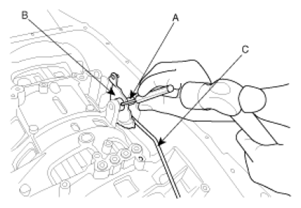
- Install the selector shaft (A), detent disk (B), and connecting rod (C) by installing the holding pin.
 Courtesy of HYUNDAI MOTOR CO.
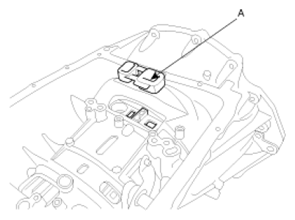
- Install the adapter (A).
CAUTION:
Must use new ones when reassembled.
 Courtesy of HYUNDAI MOTOR CO.
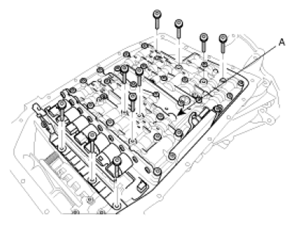
- Install the Mechatronik (A) by installing the special bolts (10ea) with TORX wrench (T40).
CAUTION:
Be careful not to drop or damage the Mechatronik.
 Courtesy of HYUNDAI MOTOR CO.
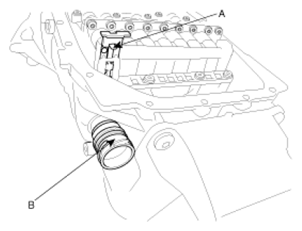
- After installing the connector housing (B), push the white clip (A) downward.
 Courtesy of HYUNDAI MOTOR CO.
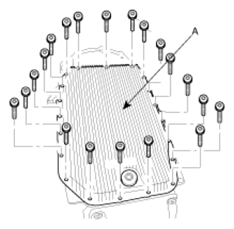
- Install the plastic oil pan (A) by installing the special bolts (20ea) with TORX wrench (T40).
CAUTION:
Be careful not to drop or damage the plastic oil pan.
 Courtesy of HYUNDAI MOTOR CO.
- Refill the ATF. (refer to PROCEDURE OF ATF LEVEL ADJUSTMENT )