4th Clutch Transmission Fluid Pressure Switch Replacement
- Remove the engine cover and the air cleaner assembly.
- Remove the bolt securing the harness cover (A).
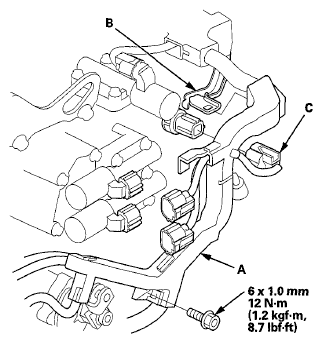 Courtesy of AMERICAN HONDA MOTOR CO., INC.
- Remove the harness cover/clamp bracket (B), disconnect the 4th clutch transmission fluid pressure switch connector (C), then remove the harness cover from the bracket.
- Remove the bolts securing the harness cover (A) and the harness cover/clamp bracket (B).
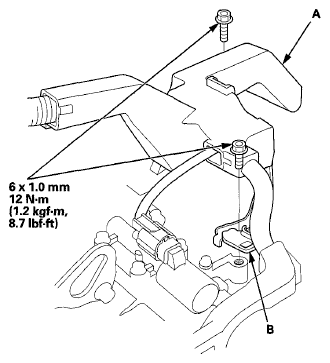 Courtesy of AMERICAN HONDA MOTOR CO., INC.
- Remove the 4th clutch transmission fluid pressure switch (A) and the sealing washer (B).
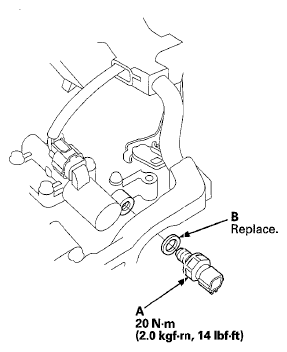 Courtesy of AMERICAN HONDA MOTOR CO., INC.
- Install a new 4th clutch transmission fluid pressure switch and a new sealing washer (B), and tighten the switch.
- Secure the harness cover and the harness cover/clamp bracket with the bolts, end install the harness clamp on the bracket.
- Install the harness cover on the cover bracket, and secure it with the bolt.
- Check the connector for rust, dirt, or oil, and clean or repair if necessary, then connect the connector securely.
- Install the air cleaner assembly and the engine cover.